
Last updated November 17, 2026
DIY vs Professional Crawl Space Encapsulation & Vapor Barrier: What’s Safe to Do Yourself
The materials for a 1,500-square-foot crawl space vapor barrier cost roughly $400 at a building supply store. Professional encapsulation of the same space runs $3,000 – $6,000 in Henderson. That gap isn’t markup. It’s the labor hours spent on the 300 linear feet of seams, terminations, and penetrations that the sheeting itself never covers. In our experience across Henderson crawl spaces, the poly is the easy part; the details are the job. This guide separates what a careful homeowner can reasonably tackle from what needs a trained crew, and it explains how to tell whether a finished encapsulation job is actually complete.
Quick Answer
A homeowner can safely lay a single layer of 6-mil poly vapor retarder over a dry, clean, accessible crawl floor, and that will reduce some ground moisture. What most homeowners cannot do is produce an airtight sealed system, because the work that determines performance happens at the seams, rim joist, foundation vents, and penetrations, and there’s no consumer-grade test to confirm those details sealed correctly. For real moisture control in a Henderson crawl space, encapsulation needs a professional assessment, proper materials, and humidity readings before and after.
Table of Contents

- What You Can Legitimately Do Yourself
- The Tasks That Require Professional Tools and Training
- Henderson-Specific Hazards to Check Before Any DIY Work
- The Warranty and Insurance Question Nobody Asks
- DIY vs Professional Encapsulation: Real Cost Breakdown
- How to Verify a Professional Encapsulation Job Is Complete
- Common Mistakes to Avoid
- When to Call a Professional
What You Can Legitimately Do Yourself
There’s a real middle ground here, and it’s worth naming honestly. A single-layer, 6-mil poly vapor retarder laid over a clean, dry, accessible crawl floor is a legitimate homeowner project. It’s physically demanding, it’s uncomfortable, and it reduces some ground moisture reaching the wood above. Many Henderson homeowners who bought between 2015 and 2025 in neighborhoods like Green Valley or Anthem have crawl spaces shallow enough to work in, and laying poly is a reasonable weekend task if the floor is level and unobstructed.
Here’s what that work will not do:
- It won’t seal the foundation vents. Henderson’s climate means vents that stay open in summer pull in hot, humid monsoon air. Poly on the floor with open vents is a half-measure.
- It won’t stop air movement at the rim joist. The rim joist is where the floor frame meets the foundation wall, and that’s the biggest air and moisture leak in most crawl spaces we open up.
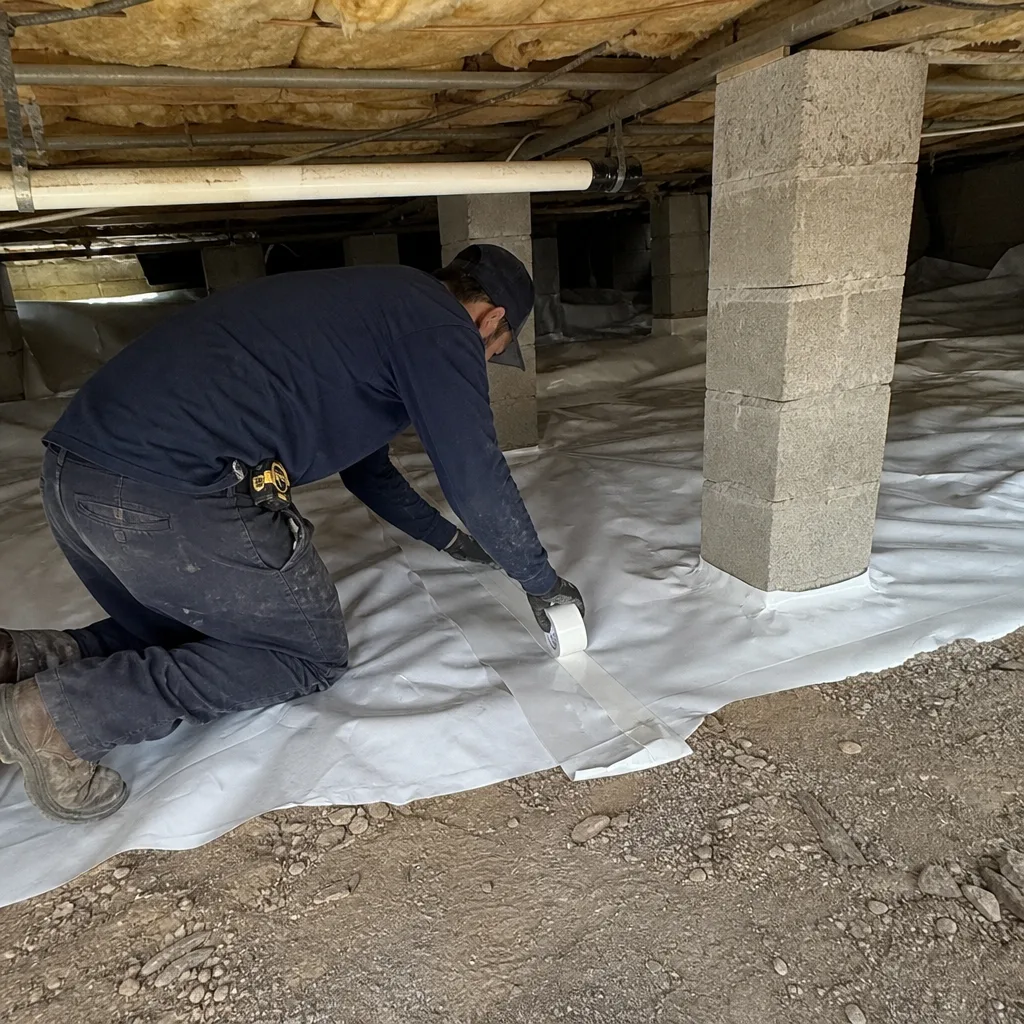
- It won’t create a continuous sealed envelope. The seams between sheets, the terminations at piers, and the cutouts around plumbing are where the system succeeds or fails, and a loose overlap isn’t a seal.
- It won’t give you a measurable before-and-after. You’ll have no baseline humidity reading, so you won’t know whether the moisture problem improved or just moved.
If the floor is wet, has standing water, or the crawl space is inaccessible, stop. Poly over a wet floor traps moisture against the wood and makes the problem worse. That’s the case where a professional assessment needs to come first.
The Tasks That Require Professional Tools and Training

Encapsulation is a system, and the system is built from details most homeowners never see. The four tasks below are what separates a $400 roll of poly from a working encapsulated crawl space.
- Seam welding and pressure-applied butyl tape. Professional encapsulation uses reinforced liner, typically 12 – 20 mil, with seams sealed using a dedicated butyl tape applied under pressure or heat-welded. A loose overlap with construction adhesive fails at the first seasonal temperature swing.
- Rim joist air sealing with spray foam. The rim joist cavity at the top of the foundation wall needs two-part spray foam applied in a controlled thickness to seal and insulate. That’s a trained application, and it’s the single highest-value air-sealing step in the whole job. We source two-part foam from Owens Corning and Icynene for this reason: the chemistry matters.
- Foundation vent sealing to code. Sealing a crawl space vent isn’t just blocking it; it changes the space to a conditioned or semi-conditioned assembly, and it needs to comply with local code. Getting this wrong traps moisture and can void the whole strategy.
- Humidity baseline and post-install measurement. A professional job starts with relative humidity and wood moisture content readings and ends with new readings that prove the system works. There’s no consumer tool that gives you a calibrated baseline and post-install reading in the same visit.
This is also where our full-service approach matters: if the crawl space needs additional insulation above, we handle Crawl Space Encapsulation & Vapor Barrier in Henderson as a sealed-first system rather than adding insulation over an unsealed envelope.
Henderson-Specific Hazards to Check Before Any DIY Work
Henderson crawl spaces carry hazards that most DIY guides never mention. Before anyone crawls in with a roll of poly, three things deserve a trained eye.
Abandoned pest control chemical deposits
Older Henderson homes, particularly those built before the mid-1990s, often have leftover pesticide granules, dust, or bait stations in the crawl space from pest treatments that stopped decades ago. Some of these chemicals remain active and require proper removal, not a shop vac and a mask. A professional assessment identifies what’s there before anyone disturbs it.
Abandoned asbestos pipe wrap
Homes built before the late 1980s in Henderson can have asbestos-containing pipe wrap or duct insulation in the crawl space. Asbestos is a real hazard, and disturbing it during DIY work releases fibers. This is a stop-and-call situation, not a work-around-it situation. Our insulation removal and replacement work routinely starts with identifying these materials before anything is touched.
Caliche hardpan that traps water
Much of the Henderson Valley floor sits over caliche, a naturally cemented layer that doesn’t drain. When water reaches caliche, it pools. Poly sheeting laid over a caliche-trapped wet zone holds the moisture right where the wood sits. A proper encapsulation has to address drainage before the liner goes down; the liner alone won’t fix water that has nowhere to go. In our experience, we see this most often in older Henderson neighborhoods where the original grade was set decades ago and never corrected.
If any of these apply, the answer isn’t a more careful DIY job. It’s an assessment, and the moisture and hazard questions need to be answered before any material is installed.
The Warranty and Insurance Question Nobody Asks

Homeowners rarely ask this, and it’s the most expensive question on the page. If you install a vapor barrier yourself and later discover moisture-related wood damage, you may find your homeowner’s insurance won’t cover the resulting claim, because the policy expects moisture management to be done correctly and an improperly sealed assembly is often treated as a maintenance failure. That’s a policy-specific answer, so check with your carrier directly. The risk, though, is real.
Structural warranties on newer Henderson homes are another layer. Most builder warranties on the structural wood frame run for a set term and can be affected by homeowner-installed modifications to the crawl space envelope. A shop-vac and a staple gun don’t look like a structural change until there’s an insurance adjuster in the crawl space.
What a professionally installed system carries instead is a documented record: the written scope before work begins, the written warranty, and a photo record of how the liner and detailing were installed. Under Haven Standard Clause 1, no work starts without a written price and a written warranty, and the 365-Day Done Right Promise is in writing before anyone lifts a tool. That’s the paper trail that matters if a warranty question ever comes up.
DIY vs Professional Encapsulation: Real Cost Breakdown
Let’s put numbers on both paths. Prices below reflect the Henderson market as we see it, and they vary with crawl space size, access, and whether drainage or insulation work is included.
| Line item | DIY | Professional |
|---|---|---|
| Vapor retarder material (1,500 sq ft, 6-mil) | $300 – $450 | Included in scope |
| Reinforced liner material (12 – 20 mil) | Not typically available retail | $1,100 – $2,200 in material |
| Butyl seam tape / welding | $60 – $120 (tape only, no pressure application) | $500 – $900 labor |
| Rim joist spray foam | Not recommended DIY | $600 – $1,400 |
| Foundation vent sealing and code compliance | Not recommended DIY | $300 – $700 |
| Humidity + wood moisture baseline readings | Not available | Included |
| Documented photo record and written warranty | Not available | Included |
| Total for 1,500 sq ft | ~$400 | $3,000 – $6,000 |
The $2,600 – $5,600 difference is the labor on seams, terminations, penetrations, and air sealing, plus the measurement that proves the job worked. If the moisture problem doesn’t actually get fixed, the $400 DIY barrier is the most expensive thing on the list. For the same reason, we recommend a free second opinion on any written encapsulation estimate you already have: bring us the quote and we’ll read it with you, line by line, so you know what’s included and what isn’t. Compare that to a competing quote for Attic Insulation in Henderson or any related envelope work, and you’ll see the same pattern: the materials are the cheap part; the detail labor is the cost.
How to Verify a Professional Encapsulation Job Is Complete

A visual walk-through (“looks good”) is not a completed job. A verifiable encapsulation produces numbers, and you should know what to ask for before final payment.
- Pre-install relative humidity reading. Ask for the baseline taken in the crawl space before any work started. A typical pre-install reading in a Henderson crawl space with active moisture issues runs 70 – 90% RH.
- Post-install relative humidity reading. A properly sealed system should read 50% RH or below after the space stabilizes. If the crew can’t produce the number, the job is unverified.
- Wood moisture content reading. A pin or pinless meter reading of the joists and subfloor. Under 16% is the target; readings above that mean moisture is still driving into the wood.
- Liner coverage documentation. Photos of the full liner coverage, with seams, terminations at piers, and the rim joist sealing documented. This should be delivered as part of the job, not on request.
- Written scope and written warranty in hand before work starts. The scope should describe what’s being sealed, what liner thickness is used, and whether drainage work is included.
This is exactly the standard we apply under the Haven Standard. Before-and-after humidity readings and a documented photo record go in the file on applicable jobs, so the homeowner can verify the result in numbers rather than in a visual impression. Ask for the same from any contractor. It’s the difference between an encapsulation and a plastic floor covering.
Common Mistakes to Avoid
- Laying poly over a wet floor. The poly traps ground moisture against the joists and subfloor, and wood rot accelerates. If the floor is wet, the moisture has to be diagnosed before anything else.
- Sealing the vents without conditioning the space. Henderson crawl spaces can develop condensation on cool surfaces when closed vents trap summer monsoon humidity against the foundation. A sealed crawl space needs to be built as an assembly, not just closed up.
- Skipping the rim joist. Poly on the floor with an unsealed rim joist is a plastic carpet. The rim joist is the biggest air leak in the crawl space, and skipping it defeats the purpose.
- Using construction adhesive instead of a proper seam system. Adhesive fails at high crawl space temperatures and at the first seasonal swing. Butyl tape applied under pressure or heat welding lasts; a bead of adhesive doesn’t.
- Ignoring caliche drainage. In Henderson neighborhoods over caliche, water pools against the poly and stays. Drainage has to be addressed before the liner, or the liner becomes a bathtub liner.
- Not checking for asbestos pipe wrap before disturbing anything. Older Henderson homes can have pipe insulation that needs professional handling. Disturbing it during DIY work is a health hazard.
- Accepting a visual inspection as proof of completion. If there’s no pre- and post-humidity reading and no wood moisture reading, you have no idea whether the system works.
When to Call a Professional
Call a professional if the crawl space floor is wet or has standing water, if you see crumbling pipe wrap, if you can’t access the rim joist, or if the crawl space has active pests or chemical deposits. Call if the home was built before the late 1980s, because the asbestos and older-material questions change the risk profile. Call if you’ve already laid poly and the musty smell has returned, which usually means the seams, rim joist, and vents were never sealed. And call if you’re comparing written estimates and want a second read on what’s included before you sign. Envelope Insulation Henderson offers free estimates in Henderson, and we’ll bring a moisture meter and the reading sheet before we quote anything. Call (844) 320-5338.
Frequently Asked Questions
Yes, you can install a single-layer 6-mil poly vapor retarder over a clean, dry, accessible crawl floor, and it will reduce some ground moisture. What it won’t do is seal the crawl space. The seams, rim joist, and foundation vents are where the system lives, and those need a professional. If your moisture problem is mild and the floor is dry, DIY poly is a reasonable step. If the floor is wet or the joists are damp, call first.
It can, in specific cases. Many homeowner policies treat improperly sealed moisture assemblies as a maintenance failure rather than a covered loss, which can affect a moisture-related wood damage claim. The answer depends on your carrier and policy language, so check directly. A professionally installed system carries a written scope and written warranty that a DIY job doesn’t, and that documentation matters if a claim ever comes up.
Most full encapsulation jobs in Henderson run $3,000 – $6,000 for a 1,500-square-foot crawl space, depending on access, liner thickness, drainage work, and whether rim joist spray foam is included. A basic 6-mil vapor barrier alone with vent sealing and rim joist work runs lower but won’t include drainage. Bring us any written estimate and we’ll read it with you line by line, free.
A properly sealed crawl space should stabilize at 50% relative humidity or below after installation, with wood moisture content under 16%. The baseline reading before the work is just as important, because it shows what the system accomplished. If a contractor can’t produce both numbers, the job isn’t verified. Call (844) 320-5338 for a free estimate and a baseline reading.
It’s safe when the crawl space is converted to a properly conditioned or semi-conditioned assembly, and it’s not safe when the vents are simply blocked without addressing the building assembly. Henderson’s monsoon season pushes humid air into unsealed crawl spaces; sealing the vents without sealing the rim joist and floor first traps the humidity against the wood. This is a code and assembly question, not a plug-the-vent question, and warrants a professional assessment.
Check for four things: a written price before any work starts, a written scope naming the liner thickness and whether rim joist sealing and vent sealing are included, a written warranty, and a commitment to provide before-and-after humidity readings and wood moisture readings with documentation. If any of those are missing, the estimate is incomplete. Call (844) 320-5338 for a free second opinion on any estimate you’ve received.
The Bottom Line
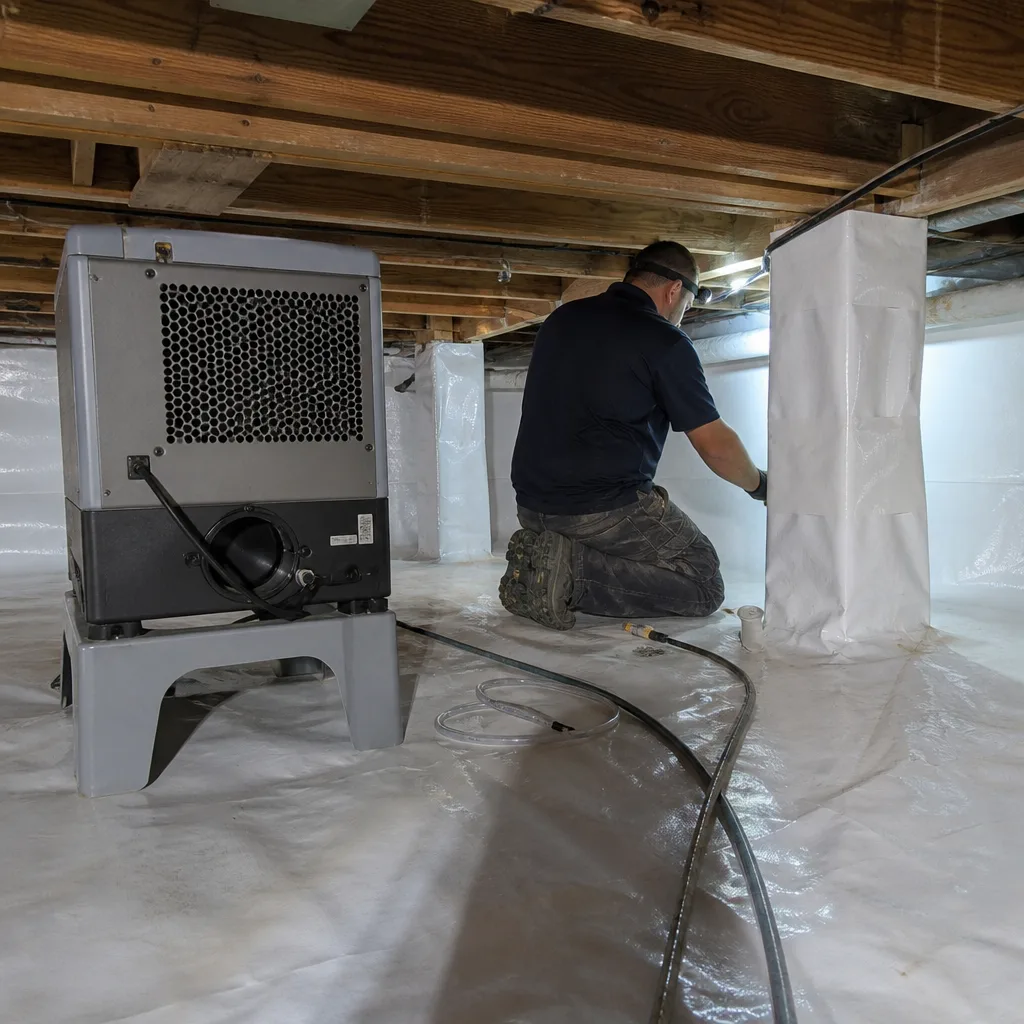
DIY poly sheeting over a dry, clean crawl space floor is within reach for a careful homeowner, and it reduces some moisture. It doesn’t seal the crawl space, and it doesn’t prove anything worked. The labor that determines performance happens at 300 linear feet of seams, rim joist terminations, penetrations, and vent sealing, and that labor has no consumer-grade equivalent. If you’re in Henderson and the crawl space is wet, older, or sitting over caliche, professional assessment comes before any material. If you need the full system, or a second read on an estimate, call (844) 320-5338 for a free estimate. We’ll bring the meter and the written price, not the sales pitch. If you’re wondering how the crawl space work ties to the rest of the envelope, start with Envelope Insulation Henderson home and we’ll walk you through it. When the crawl space needs spray foam at the rim joist, that work sits under Spray Foam Insulation in Henderson.
Contact
If you’re weighing a DIY vapor barrier against a full encapsulation, or you have a written estimate you’d like a second opinion on, call Envelope Insulation Henderson at (844) 320-5338 for a free estimate. Our technicians have up to 10 years of experience, we’ve sealed and insulated over 9,000 homes, and every job starts with a written price and ends with a documented photo record. Sealed first, then insulated, under The Haven Standard. Call (844) 320-5338.
Written by the team at Envelope Insulation Henderson.