
Last updated November 17, 2026
Crawl Space Encapsulation & Vapor Barrier Troubleshooting: Common Problems and How to Fix Them
A vapor barrier with one unsealed seam running 10 feet loses roughly 40% of its moisture-blocking area. The homeowner paid for a system; they received a large polyethylene tarp. We’ve pulled enough failed liners out of Henderson crawl spaces to know that almost every failure traces back to one of three installation errors: unsealed seams, foundation vents left open, or liner termination that stops at the footing instead of running up the wall. Each one leaves a readable signature in the humidity data. This guide shows you how to find the signature, confirm it with a moisture meter, and document the fix so the correction actually holds.
Quick Answer
Most encapsulation failures in Henderson come from three installation mistakes: seam tape that has separated, foundation vents that were never sealed closed, or a liner that terminates at the footing line instead of running up the wall to the subfloor. Diagnose them in that order using a handheld wood moisture meter and a humidity log. Wood readings above 16% at the sill plate point to the nearest failed penetration, and humidity that never drops below 50% RH after encapsulation almost always means open vents.
Table of Contents

- The Three Failure Modes and Their Signatures
- Using a Moisture Meter to Locate the Failing Section
- The Visual Inspection Sequence for a Failing Vapor Barrier
- Reading the Humidity Data: Vents, Dehumidifier, or Liner?
- Why Wall Termination at the Footing Line Fails
- How to Document a Repair So It Holds
- Preventing the Next Failure
The Three Failure Modes and Their Signatures
Before you touch anything in a Henderson crawl space, understand what you’re looking for. Encapsulation failures rarely announce themselves with standing water. They show up as elevated relative humidity, musty odor near the floor registers, and wood moisture content that slowly climbs through the cooling season. The cause is nearly always one of three things.
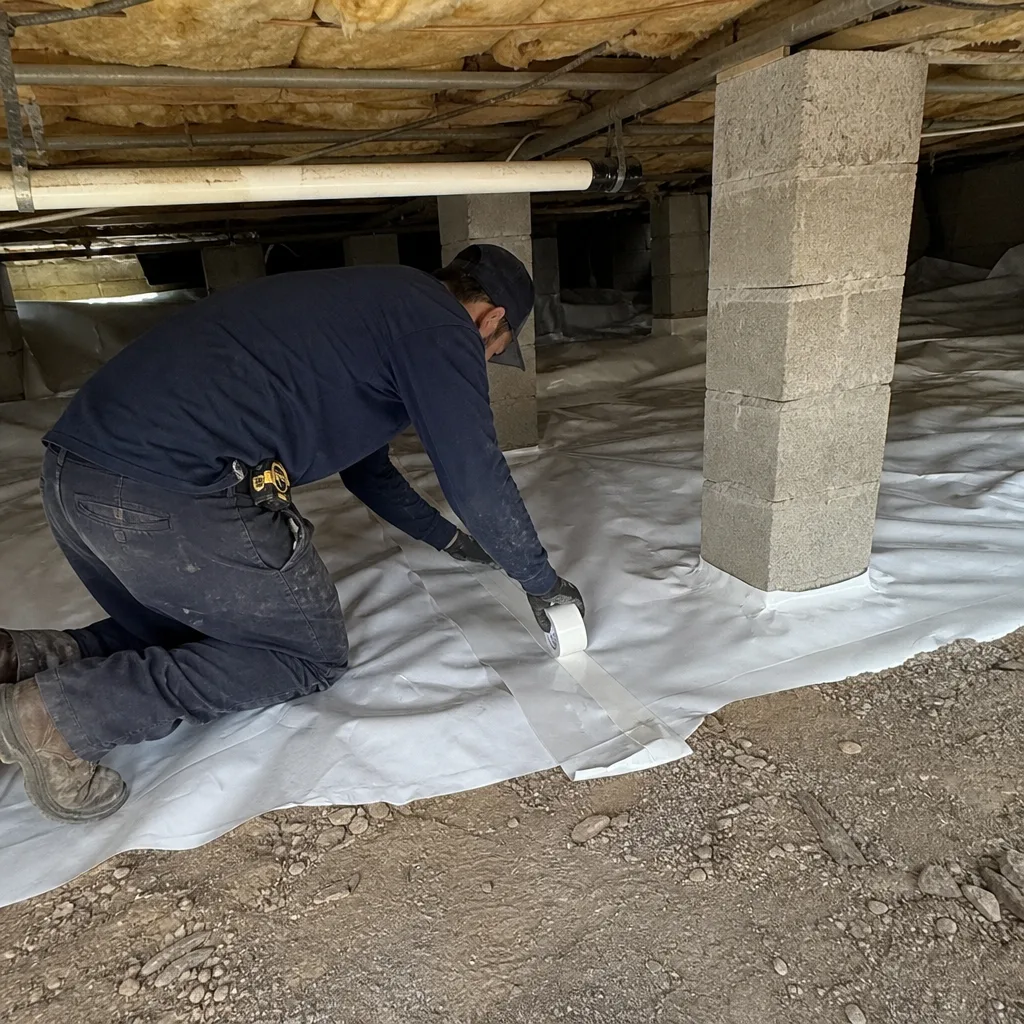
Unsealed seams and penetrations. A liner is only as good as its seams. When the tape separates, moisture vapor passes through at a rate the dehumidifier can’t outrun. The signature is localized: one section of the crawl runs wetter than the rest.
Open foundation vents. This is the single most common omission in retrofit jobs. Vents get covered over with liner but never actually sealed. In Henderson, where summer dew points can climb past 55°F, an open vent pumps humid outdoor air into the encapsulated space every afternoon.
Liner termination at the footing. If the liner stops at the footing and doesn’t run up the wall, the block wall wicks moisture directly into the crawl. The whole perimeter warms up with water vapor coming off the masonry.
Each of these three failures reads differently on a moisture meter and differently on a data logger. Separating them is the entire diagnostic exercise, and it’s the foundation of our Crawl Space Encapsulation & Vapor Barrier in Henderson inspection sequence.
Using a Moisture Meter to Locate the Failing Section

A handheld pin-type wood moisture meter, roughly $60 to $120 online, tells you more about a failing liner than any visual walkthrough. You’re measuring moisture content at the wood surface, not in the air. Live readings above 16% on the sill plate or floor joists mean water vapor is actively condensing on or being absorbed by that wood, and the nearest unsealed penetration or seam is usually within 4 to 6 feet of the reading.
Here’s the sequence we run through on every diagnostic visit:
- Start at the sill plate. Read every 3 feet along the perimeter. Readings above 16% flag a specific wall section; readings above 20% mean the wall termination has failed outright.
- Move to the floor joists. Read 12 inches from the beam and again 6 inches from the sill plate on both sides of the joist. The joist end nearest the reading is usually the culprit.
- Read the subfloor underside at the same intervals. Subfloor readings consistently higher than joist readings point to humidity pooling below the floor, which is a vent problem, not a seam problem.
- Read the mudsill and any wood in contact with masonry. Wood in direct contact with block in a Henderson crawl typically reads 2 to 4 points higher than wood a foot away, even in a healthy encapsulation. Sustained readings above 20% warrant closer attention.
- Mark each high reading with a spray chalk circle at meter height so you can verify the repair location later. Documentation first.
Do this with the dehumidifier off for at least 12 hours. You want a resting reading, not one influenced by the machine. Take the numbers into a notebook and photograph the meter display against the marked location, because those photos become the pre-repair baseline that every future reading is compared to.
The Visual Inspection Sequence for a Failing Vapor Barrier
A moisture meter tells you where the problem is. A visual sequence tells you what kind. Run it in this order so you don’t chase symptoms that were caused by something you haven’t looked at yet.
- Seam tape separation. Walk the liner looking at every taped seam. Look for curling tape edges, a light-colored line where the tape has released from the poly, and dust trapped under the tape. Any of those mean the seam is open. Tape on a liner seam should feel flat, continuous, and bonded when you press it.
- Liner pooling and ponding. Water or sagging in the liner floor indicates improper support or soil settlement. If the vapor barrier is holding water it wasn’t designed to hold, it will fail from the bottom up. Pooling in a Henderson crawl usually means the gravel base was dump-trucked rather than graded, or the liner was laid over uneven soil with no sand or drainage mat underneath.
- Wall termination gaps at the footing line. Shine a flashlight at the point the liner meets the block wall. If you can see daylight, exposed block, or a gap where the liner terminates at the footing rather than running up the wall, that termination has failed. This is the most common structural mistake we find in Henderson retrofits.
- Penetration boots and pipe collars. Every pipe, post, pier, and drain should have a boot or collar sealed to the liner. Check that each one is present and intact.
- Foundation vents. Walk the perimeter and confirm each vent is sealed on the interior face. A vent that’s covered but not sealed is an open hole. This is the check most installers skip.
This sequence takes 20 to 30 minutes in a normal Henderson crawl space under 1,800 square feet. Write down what you find at each step and photograph it. If an installer skipped the vent check, you’ll find it at step 5, and it will explain a humidity pattern that would otherwise look like a seam problem.
Reading the Humidity Data: Vents, Dehumidifier, or Liner?

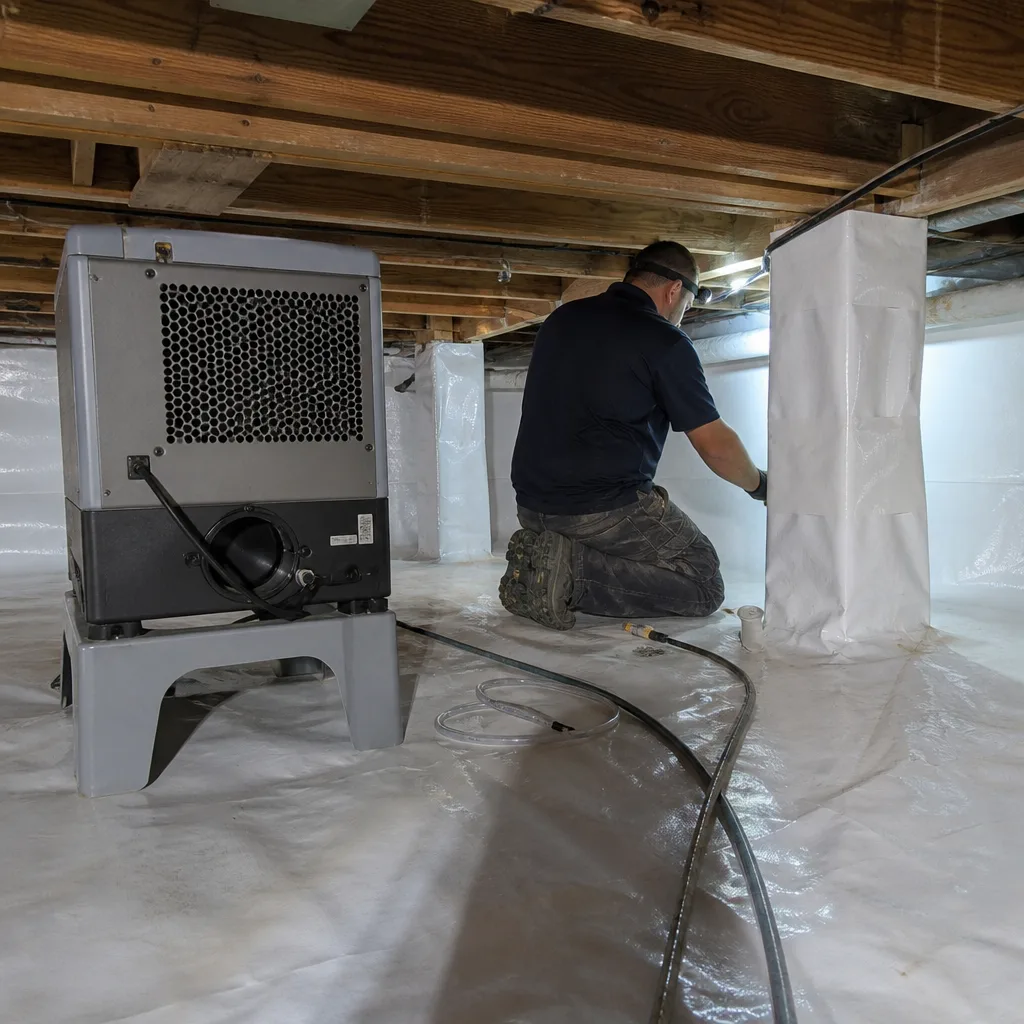
After encapsulation, a vented crawl in Henderson should stabilize between 45% and 50% relative humidity within 7 to 14 days. If it stabilizes higher, the pattern in the data tells you which of the three failure modes you’re dealing with.
- Humidity stuck at 55% to 65% RH and never drops below 50%: open foundation vents. The crawl is inhaling humid outdoor air faster than the dehumidifier can process it. This is the single most common omission in retrofit encapsulation jobs we inspect.
- Humidity that dropped to 45% after installation and slowly climbed over weeks: a liner seam has failed or a wall termination has opened. The dehumidifier was keeping up at first, then lost the battle.
- Humidity that never dropped at all: check the dehumidifier first. A failed unit shows a gradual upward trend over several days as the unit loses capacity. A failed liner shows a flat line from the first day. Those read very differently in a log.
Log the data on an inexpensive wireless humidity sensor, roughly $20 to $40, placed mid-crawl. Read it daily for two weeks after installation. If you’re past day 14 and still looking at 55% RH, you know you’re dealing with a vent or termination problem, not a dehumidifier that hasn’t caught up.
In our experience across Henderson, the pattern above 55% RH is nearly always a vent that was covered but not sealed. We’ve pulled liners off vents in Green Valley and Anthem that were stapled over rather than mechanically sealed, and every one of those crawls was stuck in the high 50s on the sensor. The home insulation work we do in Henderson starts with that exact check because a crawl space that can’t hold a humidity line can’t support the floor above it.
Why Wall Termination at the Footing Line Fails
A liner that stops at the footing leaves the block wall exposed. Block wicks groundwater and passes vapor straight into the crawl space, and it does so continuously, regardless of what the dehumidifier is doing. The wall is a wick, and the liner isn’t covering it.
Proper wall termination runs the liner up the interior face of the block to the sill plate and seals it there with mechanical fastening plus a termination bar or adhesive. The seal has to hold at two places: at the footing where the floor liner meets the wall liner, and at the top where the wall liner meets the wood. Both are common failure points in retrofit jobs.
Two things go wrong in Henderson specifically:
- Block wall courses are uneven. A liner fastened to the top block course with adhesive alone pulls loose in summer when the block expands. Mechanical termination bars spaced every 12 to 16 inches hold.
- Exterior grade sometimes sits above the footing line. In parts of Henderson where a crawl is partially below grade, the wall termination has to account for hydrostatic pressure. That means the liner needs to run to the top of the wall and be sealed where nothing can wick above it.
Fix a wall termination failure by removing the liner up to the footing, re-running it to the sill plate, and using a termination bar with a bead of sealant at the top edge. Then re-read the moisture meter at the sill plate 72 hours later. If the reading hasn’t dropped by at least 3 points, the wick is still active and you have a footing-level problem, not a wall problem. That diagnosis matters because the fix is different.
How to Document a Repair So It Holds

A repair you can’t prove isn’t a repair. Documentation is the only way to know the correction held after the technician leaves. We photograph every fix and record humidity and moisture readings before and after, because that record is what allows a homeowner or a future contractor to know what was done and whether it worked.
Here’s the documentation protocol we use:
- Record pre-repair readings. Note the location, meter reading, humidity reading, and the date and time. Photograph the meter display in the frame against the marked location.
- Describe the specific fix and location. Not “sealed seam.” Write “sealed 8-foot seam between north wall liner and floor liner, section 3, at 14 feet from the west footing. Tape applied to clean dry surface with seam roller.” The description has to read like a work order, not a summary.
- Photograph the repair in process. A photo of the seam before taping, during, and after is the record. It costs nothing to take, and it settles any dispute over what was actually done.
- Take post-repair readings 72 hours later. Humidity should have dropped to 50% or below if the fix worked, and the wood moisture meter reading at the marked spot should be at least 3 points lower. Record both.
- Compare and keep the file. Store the pre- and post-repair readings together. Every future technician who works on that crawl needs those numbers, and so does the homeowner if they sell.
We publish those before-and-after numbers on every job, because a repair with documented evidence of what changed is worth more than a verbal promise that it was fixed.
Preventing the Next Failure
The best defense against encapsulation trouble is a system installed correctly the first time with documentation and a written warranty that specifies exactly what correct termination and seam sealing look like. A written scope before any work starts prevents most of the failures in this guide, because the scope names what “sealed” means for vents, penetrations, and wall terminations. Without that definition, the installer and the homeowner are working from different expectations.
In Henderson, the highest-risk homes for retrofit failures are pre-2000 builds with original foundation vents and block walls. Those homes are also the highest-value encapsulation candidates, because the crawl is the dominant path for humid air entering the living space. Getting the details right pays for itself in reduced cooling load and floor durability, and it’s the same discipline that guides our attic insulation work in Henderson and every spray foam application in Henderson we run. Sealed first, then insulated, in that order. Always.
Common Mistakes to Avoid
- Covering foundation vents without sealing them. A liner pulled over a vent is not a closed vent. Every vent has to be mechanically sealed or the crawl draws humid air all summer long.
- Trusting adhesive-only wall terminations. In Henderson summer heat, an adhesive-only termination pulls loose within a season or two. Use a termination bar and a bead of sealant at the top edge.
- Skipping the moisture meter walkthrough. A visual inspection alone misses open seams under a folded liner. Meter readings catch what the eye can’t see.
- Assuming a dehumidifier will fix a liner failure. The right sized unit cannot process the humidity load from an open seam or an unsealed vent. Fix the liner and the dehumidifier will catch up on its own.
- Installing insulation over an unencapsulated crawl. Insulation in a wet crawl space is the wrong order. The encapsulated system comes first, then any floor insulation decisions above it.
- Laying liner directly on wet soil. Pooling and ponding follow liner over uneven ground. Grade the base, add sand or drainage mat, then lay the liner.
- No documented photo record. A repair without before-and-after readings is a verbal promise. Ask for the photo record and the readings every time.
When to Call a Professional
Some diagnostics are best run by a crew that knows what a Henderson crawl space looks like at year three. Call a professional if: your crawl humidity climbs above 55% RH more than two weeks after encapsulation; you see standing water or liner sagging across more than a few square feet; your wood moisture meter reads above 20% anywhere along the sill plate or floor joists; every vent is covered but the humidity still won’t drop; or the liner was installed years ago and no documentation exists. Encapsulation is also a permit-driven job in most of Henderson’s residential zones, so an unpermitted retrofit is a separate problem worth evaluating. Envelope Insulation Henderson offers free estimates in Henderson: call (844) 320-5338. We start with a written price before any work begins, and every visit closes with a Documented Photo Record you keep.
Frequently Asked Questions
The most common cause is foundation vents that were covered but never sealed, which lets humid outdoor air back into the crawl. The next most common is a failed wall termination where the liner stops at the footing instead of running up the wall. Rule out both before blaming the dehumidifier.
A properly sealed crawl in Henderson should stabilize between 45% and 50% relative humidity within 7 to 14 days of encapsulation. Anything stuck at 55% or higher after two weeks is a failure signature, not a settling-in period.
Read the wood at the sill plate and floor joists with a handheld moisture meter. Readings above 16% at the wood surface point to the nearest unsealed seam or penetration, and readings above 20% suggest the wall termination has failed. Combine that with the visual check for seam tape separation and liner pooling.
Small seam and boot repairs are within reach for a careful DIY homeowner, but wall termination repairs and any correction involving foundation vents are best handled by a professional. The documented readings and photo record are also a real part of the fix, because without them you can’t verify the correction held after 72 hours.
Small repairs (seam re-taping, boot replacement, vent sealing) typically run a few hundred dollars. Wall termination corrections and partial liner replacement run higher. We provide a written price before any work starts, so you know the cost before anyone lifts a tool. Call (844) 320-5338 for an exact quote, and ask for the free second opinion if you have a competing estimate in hand.
Yes, in most cases. Musty odor in the living space above a crawl usually traces to elevated humidity in the crawl passing through floor penetrations. When the humidity drops to 50% RH after a proper encapsulation, the odor almost always resolves with it. If it doesn’t, the crawl isn’t the only source and the search widens to attic penetrations and HVAC returns.
The Bottom Line
Failed encapsulation in Henderson reads like a diagnostic chart: open vents show up as 55% to 65% RH, failing seams show up as high moisture-meter readings near a specific section, and footing-line terminations show up as wall-adjacent moisture that never drops. Fix them in order, document pre- and post-repair readings at 72 hours, and keep the file. Sealed first, then insulated, in that order. That sequence, run with a moisture meter and a photo record, is what separates a system that performs from a tarp that doesn’t.
If you’re looking at a failing encapsulation in Henderson and want the diagnosis documented before anyone touches a tool, call (844) 320-5338 for a free estimate. We’ll show up on schedule, hand you a written price before any work starts, and close the job with a Documented Photo Record and a written warranty. Every job is backed by our 365-Day Done Right Promise. Our technicians have up to 10 years of experience, and a live person answers the phone around the clock.
Written by the team at Envelope Insulation Henderson.