
Last updated November 17, 2026
Crawl Space Encapsulation & Vapor Barrier Warning Signs Every Homeowner Should Know
A homeowner in Green Valley replaced the same air conditioner twice in six years. Each summer, indoor humidity climbed past 60% while the thermostat read 74°F. Two contractors checked refrigerant and ductwork. The third finally walked the crawl space with a hygrometer and found the real problem: bare soil under the house pushing moisture into the return air path all summer long. The warning signs were there the whole time, just not where anyone was looking. This guide shows you how to read the symptoms above the floor, trace them to the crawl space below, and know which numbers mean mold is already starting in a Henderson home.
Quick Answer
Crawl space encapsulation is warranted when you see cupped hardwood floors, doors that stick only in humid months, a musty smell that concentrates in the morning, condensation on ductwork or rim joists, and crawl space relative humidity above 60%. A failing vapor barrier shows up as darkened liner, standing water, peeling tape, and wet rim joist framing. Henderson’s monsoon humidity makes these signs appear fast, and encapsulation alone will not fix an active water intrusion problem.
Table of Contents

- Above-Floor Symptoms and What They Mean Below
- What a Failing Vapor Barrier Actually Looks Like
- Humidity Problem vs. Drainage Problem
- The Threshold Numbers That Matter
- How to Read a Crawl Space Inspection in Ten Minutes
- Warning Signs That Require Remediation First
- Why Henderson Crawl Spaces Fail Faster
- Common Mistakes to Avoid
- When to Call a Professional
- Frequently Asked Questions
Above-Floor Symptoms and What They Mean Below
The crawl space is the last place most people look, which is why moisture damage usually gets misdiagnosed as an HVAC problem or a flooring problem first. Every symptom in the living space has a specific cause underneath. Learning to translate them shortens the gap between “something feels off” and getting the right contractor into the right part of the house.
- Cupped hardwood floors – edges raised, center dipped. Wood absorbs moisture from the air below and from the subfloor. When the crawl space sits above 60% relative humidity (RH), the underside of the floor absorbs moisture unevenly and the boards crown at the seams.
- Doors that stick only in summer – wood swells on humidity, not heat. If the front door sticks in July and closes cleanly in January, the moisture source is the crawl space or an unsealed attic floor, not foundation settlement.
- Musty odor strongest in the morning – moisture accumulates overnight when the house cools and RH rises. The smell fades as the day warms and the air dries out. That daily cycle is a humidity signature, not a plumbing leak.
- Condensation on ducts and supply registers – cold ducts meeting warm, moist air. In a Henderson crawl space, insulated flex duct runs through unconditioned, humid air and sweats on the outside of the jacket.
- Allergy symptoms that improve when you travel – a rough but useful diagnostic. Mold spores from a damp crawl space enter through the floor and the HVAC return path.
- Higher summer power bills with no equipment change – the air conditioner is spending runtime on latent load (moisture removal) instead of sensible cooling. That shift usually tracks back to a humid crawl space.
What a Failing Vapor Barrier Actually Looks Like

A vapor barrier is the plastic or reinforced liner that separates soil from the crawl space air. When it is intact, the crawl space stays dry. When it fails, moisture rises through the soil and into the house. Here is what we look for when we walk into a Henderson crawl space, in order of how quickly it tells us the barrier has failed:
- Color change on the liner. A new liner is uniform and matte. A failed one darkens in patches where water has pooled beneath it, and chalky white mineral staining appears where groundwater has wicked up.
- Standing or pooling water under the plastic. If the liner squishes underfoot, moisture is trapped between the liner and the soil. That is the worst configuration because it concentrates the humidity rather than keeping it out.
- Peeling or delaminated tape. The seams between liner panels are taped. When the tape lifts, the seam opens and the liner stops functioning as a continuous barrier. Tape failure is the single most common reason a barrier “fails” within a few years of installation.
- Condensation on the rim joist. The rim joist is the framing member at the top of the crawl space wall, where the floor system meets the foundation. If it feels damp or shows dark staining, moisture is condensing on the coldest surface in the crawl space and feeding mold directly.
- White, powdery efflorescence on the foundation walls. Salt deposits left behind as water moves through masonry. Efflorescence means water is actively passing through the concrete block or poured wall.
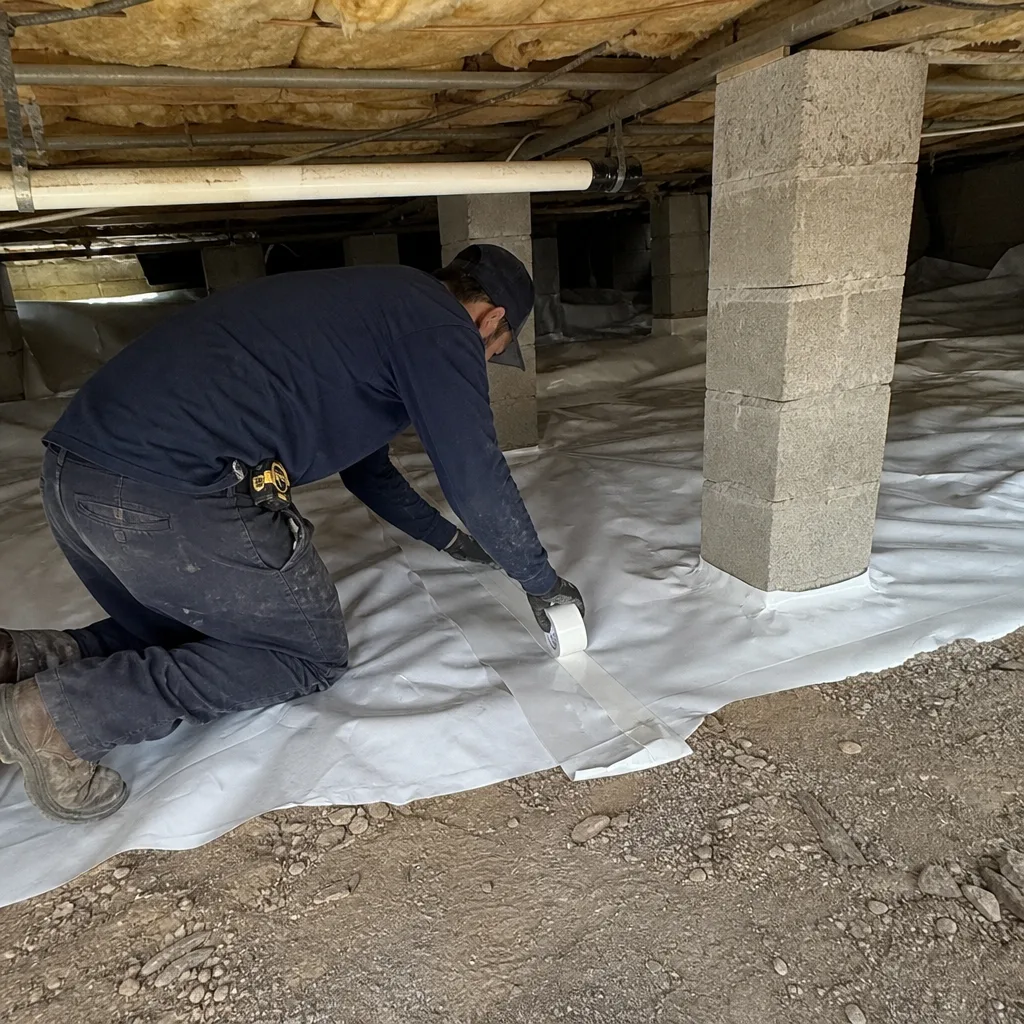
- Torn or displaced liner in traffic paths. Where the liner has been walked on, it tears. A barrier with torn traffic paths is not encapsulating the space; it is decorating the soil.
Humidity Problem vs. Drainage Problem
This distinction is the most important one in the entire guide, and it is the one most homeowners get wrong. A humidity problem is moisture vapor rising from soil or diffusing through the walls. A drainage problem is liquid water entering the crawl space from outside, from a plumbing leak, or from the water table. Encapsulation solves humidity. It does not solve drainage.
If you encapsulate a crawl space that has an active drainage problem, you trap water under a sealed liner and create a worse condition than you started with. Standing water under a sealed barrier has nowhere to evaporate, and the soil stays saturated against the foundation walls, which pushes moisture into the framing through capillary action regardless of how good the liner is.
To tell the two apart:
- Seasonal pattern – humidity problems follow weather cycles; drainage problems show up after storms or snowmelt.
- Location of moisture – humidity concentrates at the rim joist and the highest framing; drainage shows up at the soil and the low block.
- Hygrometer reading vs. hygrometer after rain – if the crawl space RH is the same in dry weather as after a rain, the moisture is vapor. If it spikes afterward, water is getting in.
- Soil texture under the liner – mud means drainage; dry crumble means vapor.
- Water staining on the block – a horizontal line of staining near the top of the crawl space wall is a classic sign of liquid water intrusion from a bad grade or a failed downspout.
The Threshold Numbers That Matter

Numbers are how you decide whether the crawl space needs work. These are the three you will see on any inspection report:
- Crawl space relative humidity (RH): 60% is the practical cutoff. Below 60% and mold growth stays limited. Above 60% and the space supports mold on wood and framing within weeks. Above 70% and it supports mold on nearly everything that can hold a spore.
- Wood moisture content (WMC): 19% is the threshold. Wood below 19% will not support mold growth. Wood at or above 19% will. Wood above 24% is vulnerable to decay fungi, not just mold.
- Interior humidity (RH): 50% in the living space during summer is normal in Henderson. If your interior hygrometer reads above 55% with the air conditioner running, the system is not removing moisture and the source is somewhere it should not be – usually the crawl space.
What those numbers mean for mold risk: crawl spaces sitting between 60% and 65% RH develop mold colonies in corners and on north-facing framing within a season. Crawl spaces sitting above 70% develop visible mold on rim joists, floor joists, and duct insulation within weeks of the monsoon season. Wood moisture above 19% is a direct call for remediation before you add a liner.
How to Read a Crawl Space Inspection in Ten Minutes
You do not need to crawl under the house yourself. You need to know what the person with a flashlight and a moisture meter is looking for, so you can read the report. Here is how a competent inspection runs:
- Hygrometer reading at the center of the crawl space. One number, taken about a foot off the soil, tells you the RH condition.
- Moisture meter on the rim joist and the floor joists. Readings below 19% are stable; at or above 19% means mold is viable.
- Visual scan of the entire liner. Look for color change, pooling, tape delamination, and torn traffic paths.
- Foundation wall inspection. Efflorescence, staining, and on poured walls, visible cracks with mineral deposits.
- Grade and drainage check outside. The soil should slope away from the foundation and downspouts should discharge six feet or more from the wall.
- Ductwork check. Insulated flex ducts should not hang in contact with the soil or show condensation on the jacket.
- Vent check. Are the foundation vents open, screened, and unobstructed? In some climates vents help; in Henderson’s humidity, they often hurt.
Every one of those steps should be documented in a report with photos. Under the Haven Standard, a Documented Photo Record is included on every visit, so you keep the evidence rather than a verbal summary.
Warning Signs That Require Remediation First

Encapsulation is step two in some homes, not step one. Certain conditions must be resolved before any liner work begins, because sealing a crawl space with these problems in place traps the damage under plastic.
- Standing water or active seepage – a drainage contractor or foundation specialist must address the source first. Encapsulating over active water intrusion is the single most common encapsulation failure we see.
- Visible mold covering more than a few square feet – a remediation contractor removes the mold and verifies the clearance before the crawl space is sealed. Sealing over active mold colonies just preserves them.
- Rodent activity, nesting, and soiled insulation – pest proofing and insulation removal come before encapsulation. If the crawl space has been open to rodents, the diagnostic step is a professional assessment.
- Structural damage to the foundation or framing – cracked joists, sagging beams, or compromised piers require an engineer or foundation contractor first.
- Sewage or graywater leaks – a plumber fixes the leak, the crawl space is cleaned, and then encapsulation can be scheduled.
- Active termite activity – treatment comes first. Some liner installations interact with termite inspection access, so coordinate with your pest professional.
If you are unsure which category your crawl space falls into, a proper inspection will tell you. The default assumption should be that any active water or mold condition is a reason to delay encapsulation, not rush it.
Why Henderson Crawl Spaces Fail Faster
Henderson’s climate stresses a crawl space in ways that a wetter climate does not. Summer monsoon moisture arrives fast: two or three days of 40% plus outdoor RH will raise crawl space humidity above 70% in a home with a bare soil floor. The outdoor heat, meanwhile, drives the pressure difference that pulls that moisture into the house through the floor and the return duct.
Most Henderson crawl spaces also have what the trade calls a “short barrier” problem. Builders in the 1990s and 2000s commonly installed a 6-mil plastic sheet over part of the crawl space, held down with rocks or bricks, and stopped short of the foundation walls. That configuration catches vapor at the center and releases it at the edges, right onto the rim joist. On a home in Anthem or the older sections of downtown Henderson, the edges are almost always where the barrier failed first.
Henderson homes also tend to have the air handler and a portion of the ductwork in the attic, which means a humid crawl space is not the only source of moisture but is often the biggest. The return air path, if it pulls from a floor grille near the crawl space access, becomes a direct duct for humid air. That is why the homeowner in the opening story saw the problem show up inside the house before anyone crawled under it.
Winds and sun on the exterior walls also matter. On the sunny sides, the rim joist stays warm and dry; on the north side, it stays cool and condenses. That asymmetry is why the “musty odor in the morning” complaint almost always points to the same corner of the house. If you are looking at the full picture for a Henderson home, our Crawl Space Encapsulation & Vapor Barrier in Henderson page walks through the full scope, but the diagnostic work always starts with a hygrometer and a moisture meter.
Common Mistakes to Avoid
- Assuming your HVAC is the problem. Henderson’s summer humidity makes the air conditioner work harder, but a system that was sized correctly does not cause indoor RH above 55% by itself. Check the crawl space before calling an HVAC contractor.
- Encapsulating over a drainage problem. If water is entering the crawl space, fix the water first. Sealing moisture in traps it against the foundation and the framing.
- Installing a barrier without taping the seams. A liner held down with landscape staples and no seam tape is not a vapor barrier, it is a floor covering. Seams and wall penetrations are the whole job.
- Trusting a “vapor barrier” that stops short of the walls. A barrier that ends at the crawl space edge leaves the rim joist exposed. That is where condensation starts and where mold becomes visible.
- Skipping the moisture reading on the wood. Adding a liner to framing above 19% WMC does not fix the moisture; it locks it in. The framing has to dry first.
- Venting a crawl space in a humid climate. Foundation vents bring Henderson’s summer moisture in rather than letting it out. Some homes need vents; the recommendation depends on the specific condition.
- Hiring an encapsulation crew without a written scope. A written scope should name the liner thickness, how the seams and wall penetrations are sealed, the moisture readings taken before and after, and what happens to the rim joist and the ductwork. If it does not, the work is not specified.
When to Call a Professional
Call for a professional inspection if you see any of the following: a musty smell that concentrates in one part of the house, hardwood floors cupping in the same room every summer, doors that stick seasonally, condensation on ductwork or rim joists, efflorescence on the block, or a crawl space with a bare-soil floor and no continuous liner. If you own a Henderson home built after 1990, the chance that the original barrier is intact is low, especially if the liner was installed during construction. If the crawl space has standing water, visible mold over a few square feet, or rodent activity, the first call is a remediation contractor, not an encapsulation crew.
Envelope Insulation Henderson offers free estimates in Henderson and will tell you which category your crawl space falls into. Call (844) 320-5338. Every visit includes a Documented Photo Record, and any written estimate we hand you comes with a Free Second Opinion guarantee – we will read a competing quote with you and tell you what it is actually scoped to do.
Frequently Asked Questions
The first signs are typically above the floor: cupped hardwood, doors that stick only in summer, a musty smell that peaks in the morning, and condensation on ductwork. Below the floor, the first sign is usually crawl space relative humidity above 60% measured at the center of the space. If you read both together, you have a humidity problem rather than a drainage problem. Call (844) 320-5338 for a Henderson inspection with a hygrometer reading.
Above 60% is the practical threshold. Below 60%, mold growth stays limited. Above 70%, mold can spread onto framing and duct insulation within weeks of the monsoon season. Wood moisture content above 19% is the equivalent red flag for the framing itself. If you do not own a hygrometer, a $30 handheld unit in the crawl space gives you a useful first reading. For a professional reading with documentation, call (844) 320-5338.
No. Encapsulation fixes moisture vapor rising from soil and diffusing through foundation walls. It does not fix liquid water intrusion from drainage, groundwater, or plumbing leaks. If standing water is present, a drainage or foundation specialist addresses the source first, and the encapsulation comes second. Sealing over active water intrusion is the most common way a crawl space encapsulation job fails. Call (844) 320-5338 and we will tell you which category you are in.
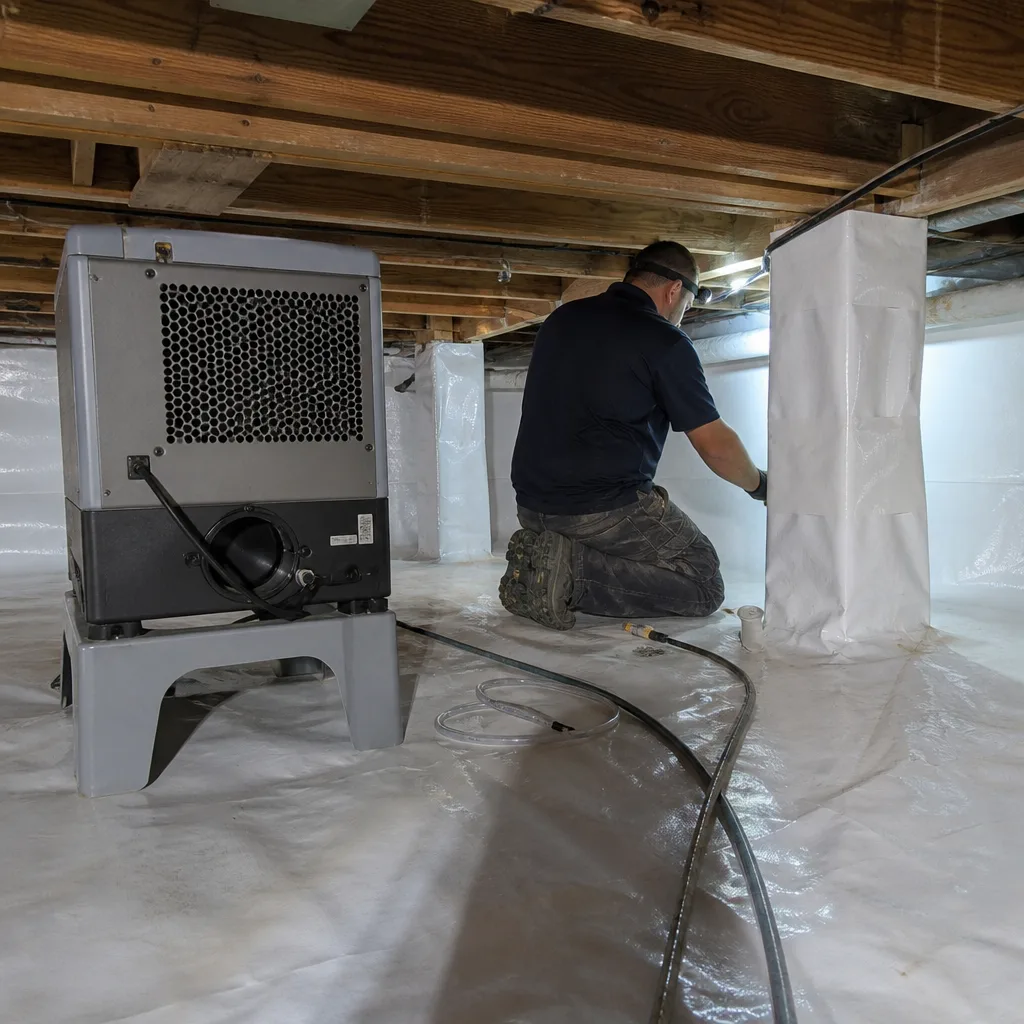
Most residential crawl space encapsulation jobs in Henderson run between roughly $4,500 and $12,000 depending on square footage, whether a sump and dehumidifier are included, and the condition of the existing liner. Full encapsulation with a dehumidifier typically runs higher than a continuous barrier alone. Remediation – mold, rodent cleanup, or drainage correction – is quoted separately and comes first when it is needed. Every written price we issue includes the scope, the liner specification, and the moisture readings taken before work begins. Estimates are free – call (844) 320-5338.
Yes. The most common failure is tape delamination at the seams, which is invisible from outside the crawl space and shows up as a gradual rise in indoor humidity over a season. Torn traffic paths and displaced liner at the walls are the other two silent failures. A crawl space with an intact-looking liner can still read 65% RH. That is why the diagnostic step is a hygrometer reading rather than a visual check alone. Call (844) 320-5338 for an inspection with documented readings.
If visible mold covers more than a few square feet, call a remediation contractor before any encapsulation work begins. The mold has to be removed and the clearance verified, then the crawl space is dried, then encapsulation is scheduled. Sealing over active mold preserves it and the problem returns. If you are unsure whether the condition is mold or mineral staining, a professional inspection will tell you. Call (844) 320-5338 and we will tell you whether you are looking at remediation or encapsulation first.
The Bottom Line
The warning signs of a failing crawl space almost always appear in the living space before anyone looks under the house. Cupped hardwood, seasonally sticking doors, and a morning musty odor are the three that read clearly, and each one maps to a specific cause: humidity, wood moisture, or condensation on cold framing. The threshold numbers are the same in every Henderson home – 60% RH and 19% WMC. Encapsulation solves humidity, not drainage, so active water intrusion comes first. A written scope, before-and-after moisture readings, and documentation of what was found and fixed is what separates a real encapsulation job from a plastic sheet on the floor. If you want to read what a full scope looks like, our Crawl Space Encapsulation & Vapor Barrier in Henderson page covers it, and our Attic Insulation in Henderson guide covers the other half of the building envelope. Both are worth understanding together, because a sealed crawl space and a sealed attic floor work as one system, not two.
Ready to get a real reading on your Henderson home? Call (844) 320-5338 for a free estimate. We will bring a hygrometer and a moisture meter, take written readings, and give you a written price before any work starts. Every job closes with a Documented Photo Record and our 365-Day Done Right Promise. We carry GreenFiber and Owens Corning materials, so the liner and sealant spec is on the estimate, not buried in a catalog.
Written by the team at Envelope Insulation Henderson.