
Last updated November 17, 2026
Spray Foam Insulation Troubleshooting: Common Problems and How to Fix Them
Spray foam that looks correct from below an attic hatch can still be missing coverage at every rafter-to-top-plate junction, which is the exact location where conditioned air escapes. A flashlight inspection catches maybe 30% of these gaps. A blower-door test with a smoke pencil catches them all. Most spray foam problems we get called to in Henderson aren’t foam failures at all. They’re installation failures that the foam’s smooth, finished appearance conceals for months, sometimes years, which makes them harder to diagnose than a sagging batt or a thin patch of blown-in. This guide teaches you what to look for yourself, and which findings actually need a contractor versus a diagnostic test.
Quick Answer
The three most common spray foam problems are adhesion failure where foam meets framing or sheathing, shrinkage cracking at the foam-to-framing joint, and voids around complex geometry like HVAC penetrations and can lights. Most can be diagnosed with a blower-door test and smoke pencil, not a visual walkthrough. Small voids and cracks under a certain depth can be patched with two-part pour foam; large areas of failed adhesion or foam that has pulled away from the substrate usually require removal and re-spray.
Table of Contents

- The Three Failure Modes Unique to Spray Foam
- Why You Have Cold Spots on the Ceiling After Spray Foam
- Smell Complaints: Incomplete Cure vs. Moisture in the Assembly
- What a Blower-Door-Guided Audit of a Spray Foam Job Looks Like
- Patch With Pour Foam or Remove and Re-Spray?
- What a Visual Inspection Misses in Henderson Homes
- Common Mistakes to Avoid
- When to Call a Professional
The Three Failure Modes Unique to Spray Foam
Batt insulation fails by sagging, compressing, or getting wet. Blown-in fails by settling or blowing around. Spray foam fails differently, and the failures are harder to spot because the foam still looks like foam. In Henderson, where we run spray foam jobs through the hottest months on the calendar, these three show up again and again.
- Adhesion failure at the substrate interface. Foam that didn’t bond to the framing, sheathing, or drywall can pull away cleanly, leaving a gap behind it that you can’t see from the surface. This happens most often when the substrate was dusty, damp, or too cold at application. A pass of the hand won’t find it. A blower-door test with a smoke pencil will.
- Shrinkage cracking at the foam-to-framing joint. As foam cures it shrinks slightly. On a well-applied job that shrinkage is negligible. On a job applied too thick in one pass, or in the wrong temperature range, the shrinkage opens hairline cracks right at the joint where the foam meets the stud or rafter, which is exactly where air wants to travel.
- Voids at complex geometry. HVAC penetrations, can lights, plumbing chases, and the corners where three framing members meet are the hardest spots to spray evenly. A foam gun moving at production speed skips these. The foam looks continuous from six feet away. From two inches away there’s a gap the width of a pencil, and that gap is your air leak.
Each of these is diagnosable and fixable. None of them is a problem with the Icynene or Demilec product itself. The chemistry is not the variable. The application is.
Why You Have Cold Spots on the Ceiling After Spray Foam
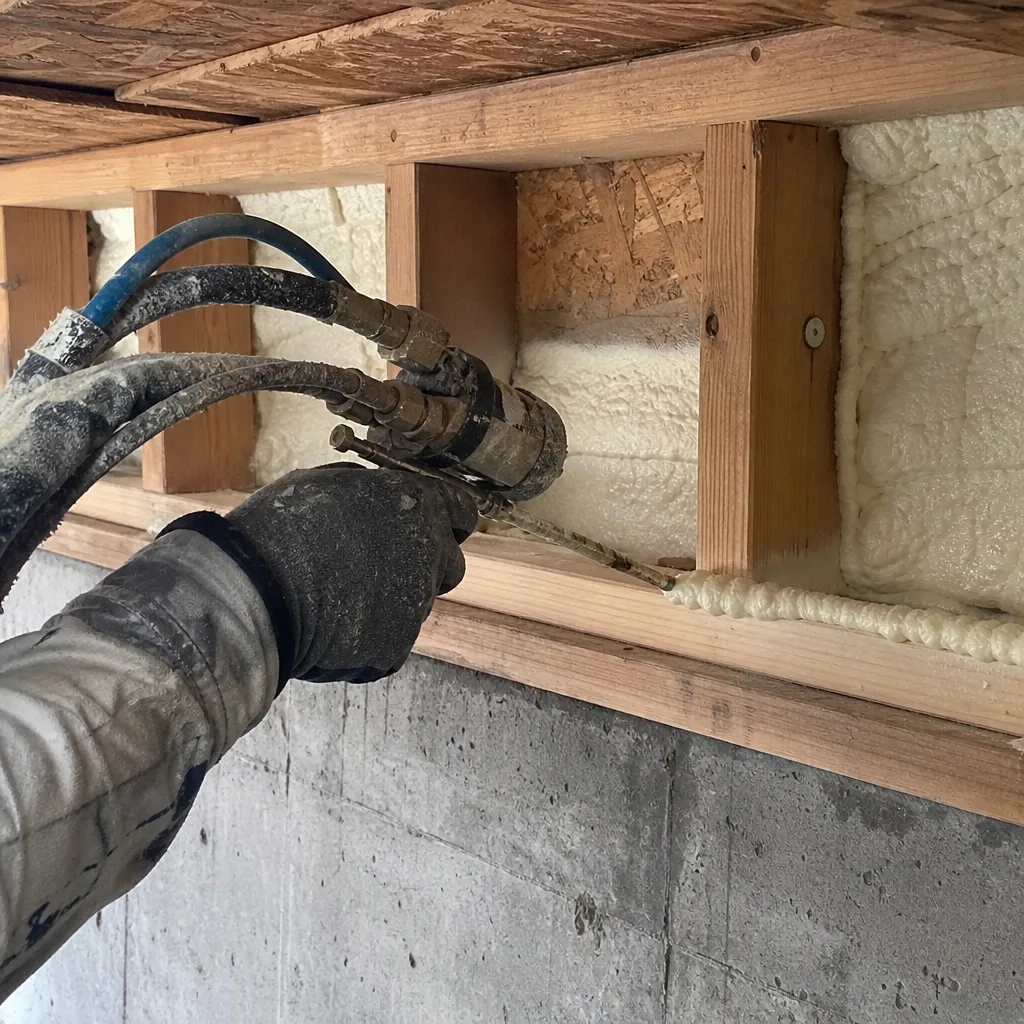
A cold spot on an interior ceiling after a spray foam job is diagnostic of one specific defect: missing or thin foam coverage at that exact location, usually where a rafter bay meets the top plate or where a recessed light was foamed around but not over. It is almost never a foam-brand problem. If the whole ceiling were under-insulated you’d feel general coolness, not a defined patch the size of a dinner plate. A cold spot that shape means there is a physical gap above it that the foam didn’t reach.
In Henderson, this shows up most in 1990s and 2000s stucco homes where the attic was spray-foamed as a retrofit. The original batt insulation was pulled out, the foam went in, and the installer worked fast around the rafters. The cold spot forms where a rafter bay was skipped, or where the foam stopped short of the top plate by an inch or two. On a summer afternoon when the attic hits 140°F, that gap is dumping heat straight onto your ceiling drywall. In winter, the same gap is where warm interior air escapes and condenses.
How to tell the difference between a cold spot and something else:
- Defined patch, ceiling only: almost always missing foam coverage. Needs a blower-door-guided inspection.
- Broad cool area, whole room: could be insufficient R-value overall or an HVAC balance issue, not a foam defect.
- Cold spot that moves or grows: usually moisture, which is a different problem entirely. See the smell section below.
Under The Haven Standard we seal first, then insulate. On a spray foam retrofit, that means top plates, can lights, and penetrations get air-sealed before the foam goes on. When that step gets skipped, you get the cold spots described above. You can read more about how we sequence this work on our spray foam insulation in Henderson page.
Smell Complaints: Incomplete Cure vs. Moisture in the Assembly
The smell after a spray foam job falls into two distinct categories, and they require completely different responses. Getting them confused is the most expensive mistake a homeowner can make during the first ninety days after installation.
Incomplete cure smell is a chemical, solvent-like odor that shows up within 24 to 72 hours of application and fades steadily over one to three weeks. It happens when the foam was applied outside the manufacturer’s temperature or humidity range, which in Henderson means either a cool winter morning when the substrate was below spec, or a summer attic that was too hot and dry for proper reaction. This odor is a nuisance but not a failure. Ventilation and time usually resolve it, and if it lingers past three weeks you have a legitimate call-back to the installer.
Moisture in the assembly smells different. It’s a musty, damp, or earthy smell that shows up weeks or months later and doesn’t fade. That smell indicates water is caught between the foam and the substrate, or inside a wall cavity where the foam created a vapor barrier on the wrong side. This is a real problem, not a nuisance, and it can lead to rot and mold if it isn’t addressed. Two-part spray foam is a vapor barrier at the thicknesses used in most wall assemblies. If it went in on the wrong side of a Henderson home that gets heavy summer humidity swings, moisture gets trapped.
If you can answer “yes” to any of the following, the smell is moisture and not cure:
- The smell began more than a month after installation and has not faded.
- The smell is stronger on humid days or after rain.
- You notice the smell near an exterior wall, not near the attic hatch.
- You see discoloration on drywall, baseboards, or trim in the same room.
Moisture problems require a blower-door assessment plus a look at the assembly, not a fresh coat of foam over the top. Call us at (844) 320-5338 if you’re unsure which category you’re in. We’ll tell you before any work starts, and the estimate is free.
What a Blower-Door-Guided Audit of a Spray Foam Job Looks Like
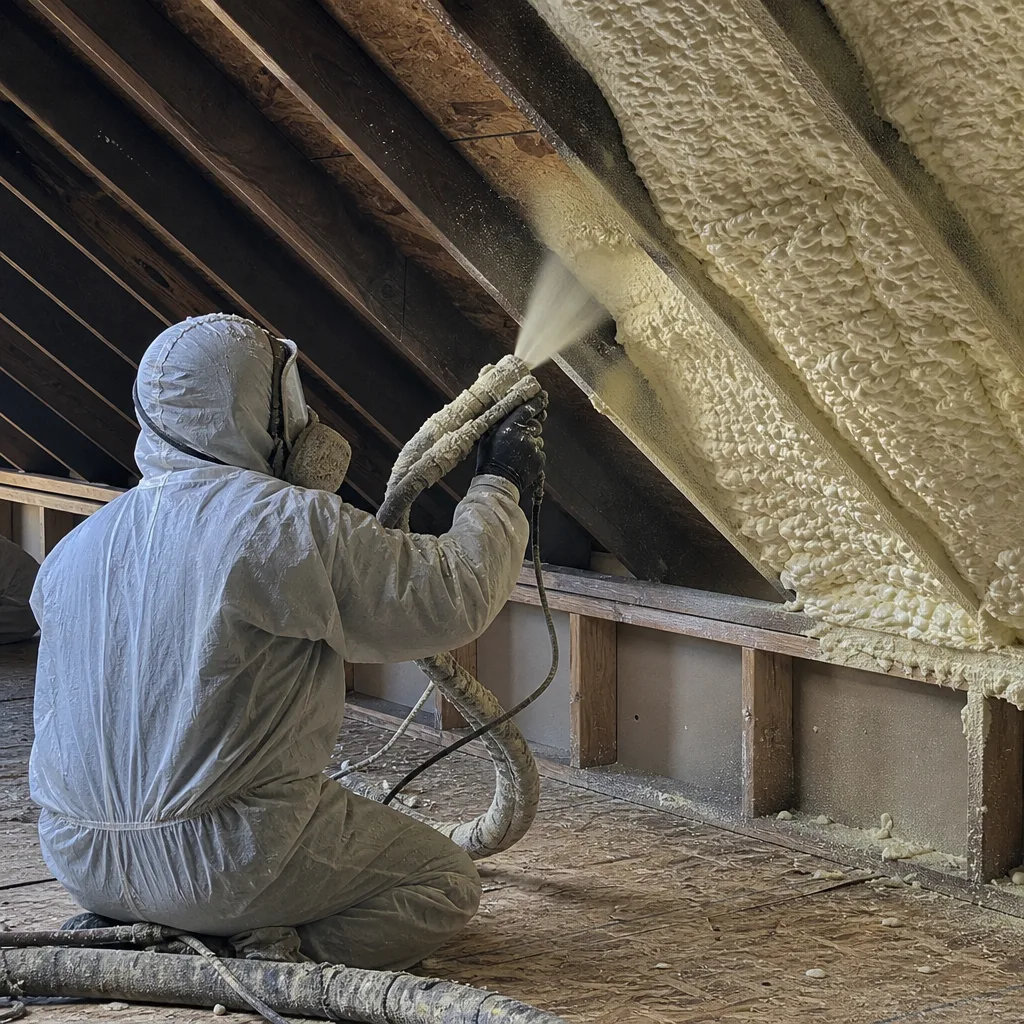
A blower-door test is a pressurization measurement that shows, in one number, how much air your building envelope is losing. On a spray foam troubleshooting visit it does two things a visual inspection cannot: it tells you whether the job is actually leaking, and it lets you pinpoint where. Here’s the sequence a proper audit follows.
- Baseline reading. The technician sets the blower door in an exterior doorway, pressurizes the house to 50 pascals, and records the leakage in CFM50. That number gives you a starting point you can compare to after the repairs.
- Interior walk with a smoke pencil. With the house still under pressure, the technician walks the attic floor and the interior walls with a smoke pencil or thermal camera. Air moving through a gap pushes the smoke. A missing foam patch at a rafter-to-top-plate junction shows up like a beacon.
- Attic hatch and penetration check. The technician specifically inspects the penetrations that fail most often: can lights, plumbing chases, HVAC boots, and the corners of the attic hatch itself.
- Second reading after repairs. When we do the repair, we take a second blower-door reading to show the change. A job that read 4,200 CFM50 before sealing and 2,100 after is telling you something a photograph can’t.
That before-and-after number is the whole point. A visual inspection of the same attic looks identical before and after the repair. A blower-door reading doesn’t. When you’re evaluating a spray foam contractor in Henderson, ask whether they provide blower-door numbers on the job. If the answer is a walkthrough with a flashlight, you’re accepting a partial diagnosis.
If you want to understand what a proper diagnostic looks like outside the attic, our crawl space encapsulation and vapor barrier service in Henderson follows the same evidence-first pattern. Sealed, tested, documented.
Patch With Pour Foam or Remove and Re-Spray?
The decision between patching and re-spraying comes down to two factors: how much area is affected, and how deep the gap goes. Small defects can be patched cleanly. Large ones can’t, and trying to patch over a large gap creates a new problem on top of the old one.
Patchable with two-part pour foam:
- Isolated voids at HVAC penetrations, plumbing chases, or can lights smaller than roughly 2 inches by 2 inches.
- Hairline shrinkage cracks at the foam-to-framing joint where the foam behind the crack is still bonded.
- Thin or skipped spots with foam on both sides that just need topping off.
Requires removal and re-spray:
- Any area where the foam has pulled away cleanly from the substrate over more than a few square inches. Foam that has delaminated can’t be re-glued; it has to come out and start fresh.
- Thick shrinkage cracks where you can slide a feeler gauge more than about a quarter inch back under the foam.
- Foam applied at the wrong thickness in a single pass that is now cracking through its whole depth.
- Any area with active moisture behind it. Foam over wet wood seals the moisture in.
There’s a threshold worth knowing: two-part pour foam stops being effective as a patch at a gap depth beyond roughly 1.5 inches, because the pour foam won’t reliably fill a deep void and bond to both sides of it. Past that depth, you’re paying for a patch that will fail again. Better to remove and re-spray. On jobs we repair in Henderson, we photograph the affected area before and after so you have a record of what was actually found and fixed, not just what we said we found.
What a Visual Inspection Misses in Henderson Homes

Henderson homes have a specific set of attributes that make visual inspections especially unreliable. The combination of extreme summer heat and moderate winter humidity means foam goes down under conditions that can disguise early defects for months. Three things we consistently find:
- Stucco and EIFS exteriors from the 1990s and 2000s hide foam adhesion failures at the sheathing interface. You can’t see the sheathing from the attic. You can’t see it from outside. The only way to know is to test.
- Flat and low-slope roofs on custom homes put HVAC equipment and penetrations in places where foam is applied from awkward angles. Coverage is almost always thinner at those spots. A flashlight from the hatch shot misses them entirely.
- Two-story homes with vaulted ceilings often have spray foam applied to the underside of the roof deck. The junction between the wall top plate and the vault is a blind spot from below. If the foam stopped an inch short of the plate, you’ll feel it as a cold patch in winter and never see it in the attic.
If your home is in Green Valley, MacDonald Ranch, or Anthem and was spray-foamed as a retrofit in the last ten years, a blower-door-guided audit is worth the cost. It finds what the flashlight misses. You can see how we handle the same diagnostic standard on our attic insulation in Henderson page, which covers both spray foam and blown-in troubleshooting.
Common Mistakes to Avoid
- Accepting a “walkthrough” as a diagnosis. A contractor who inspects the attic with a flashlight and tells you everything looks good is giving you a 30% answer. Ask for a blower-door reading before and after any repair.
- Painting over or drywalling over a cold spot without a test. The cold spot is telling you something. Covering it up hides the symptom and lets the air leak keep running through Henderson’s hot summers.
- Calling the smell a “new foam smell” six weeks in. Cure smell fades by week three. If it’s still there at week six, the cause is moisture, and it needs to be diagnosed before more insulation goes on.
- Patching a delaminated void with spray-can foam. Hardware-store foam in a can doesn’t have the adhesion strength of two-part pour foam, and it doesn’t bond reliably to framing at cold temperatures. It’s the wrong material for the job.
- Assuming the foam is the problem when the air sealing was never done. This is the single most expensive mistake. If the top plates, can lights, and penetrations weren’t sealed before the foam went in, no amount of additional foam will fix the leak.
- Hiring the cheapest bid on a full removal and re-spray. Removal is labor-heavy. A bid that’s dramatically lower than the others is usually skipping the removal and spraying over the top, which is guaranteed to fail again.
- Skipping the second blower-door reading on the re-spray. If the contractor doesn’t offer to show you a before-and-after reading, you have no way to verify the repair actually worked.
When to Call a Professional

Some of what’s in this guide is worth trying yourself: a visual check of the attic hatch, a pass with a flashlight at the penetrations you can reach safely. But any finding that involves getting up on ladder-height framing, opening a wall, or removing foam needs a trained technician. High spots on a low-slope roof, wall penetrations on two-story vaults, and any active moisture problem are not DIY territory. The tools alone (blower door, smoke pencil, thermal camera) cost more than the diagnostic service.
Call a professional when:
- You have a defined cold spot on an interior ceiling that doesn’t go away.
- You smell musty or damp air near an exterior wall weeks after installation.
- You can see cracks or delamination in the foam that a feeler gauge confirms is deeper than a quarter inch.
- You had spray foam installed and never received a blower-door reading on the job.
- You’re buying a home that was spray-foamed and want to know what you’re actually getting.
Envelope Insulation Henderson offers free estimates in Henderson. We’ll run the blower-door test, show you the reading, and tell you what needs patching versus what needs removal before any work starts. Call (844) 320-5338.
Frequently Asked Questions
Almost never. A cold spot on an interior ceiling after a spray foam job points to a specific installation defect: missing or thin foam coverage at that exact location, usually a skipped rafter bay or a gap at the top plate. It’s diagnosable with a blower-door test and a smoke pencil, and fixable with a patch or targeted re-spray. Call (844) 320-5338 for a free estimate and we’ll tell you which.
Cure smell from a spray foam job fades within one to three weeks. If it’s still there at three months, it’s not a cure problem. It’s moisture in the assembly, which means water is trapped between the foam and the substrate or inside a wall cavity where a vapor barrier is on the wrong side. This needs a diagnostic visit, not more foam. Call (844) 320-5338 and we’ll test before any work is scheduled.
Not reliably. Hardware-store spray-can foam doesn’t have the adhesion strength of two-part pour foam, and it doesn’t bond well to framing in cold temperatures. Small voids around HVAC penetrations can be patched with two-part pour foam by a technician. Delaminated areas and deep shrinkage cracks need removal and re-spray, which is not a DIY job. Call us for a free estimate in Henderson.
You ask for the blower-door numbers. A proper spray foam job includes a baseline reading before sealing and a second reading after, showing the actual CFM50 drop. Without those two numbers, you’re relying on a visual inspection that misses roughly 70% of gaps. If you don’t have numbers and you’re in Henderson, call (844) 320-5338 to schedule a blower-door-guided audit.
In most cases repair is cheaper, and significantly so. Targeted patch work or localized re-spray runs a fraction of a full removal and respray. The exception is a job with widespread delamination at the substrate interface, where the foam can’t be re-bonded and full removal is the only reliable fix. A blower-door test tells you which situation you’re in before you commit to anything. Call (844) 320-5338 for the test. Estimates are free.
It makes some failures more noticeable and others easier to hide. Henderson’s summer heat amplifies the effect of any missing coverage in the attic, so cold spots on ceilings show up harder than in a milder climate. The dry summers also make substrate-moisture conditions during application hard to read, so installation defects can sit concealed for months. That’s why we run every job under The Haven Standard, sealed first and tested after. If your job was done by someone else, call us at (844) 320-5338 for a free second opinion on any written estimate. See our Envelope Insulation Henderson home page for how our diagnostic process works.
The Bottom Line

Most spray foam problems are installation defects, not foam defects. That matters because the foam still looks like foam, which means the problem hides. The three failure modes to know are adhesion failure at the substrate, shrinkage cracking at the foam-to-framing joint, and voids at complex geometry. A flashlight catches some of them. A blower-door test with a smoke pencil catches all of them. Small gaps under about 2 inches by 2 inches and 1.5 inches deep can be patched with two-part pour foam. Delamination, deep cracks, and active moisture need removal and re-spray. Don’t accept a walkthrough as a diagnosis. Ask for the numbers.
If you’re dealing with a spray foam problem in Henderson, or you’re not sure whether you have one, call Envelope Insulation Henderson at (844) 320-5338 for a free estimate. We’ll run the blower-door test, show you the reading, and give you a written price before any work starts.
Written by the team at Envelope Insulation Henderson.