
Last updated November 17, 2026
How Long Does Crawl Space Encapsulation & Vapor Barrier Take? Timelines and What to Expect
Most contractors quote “1 – 2 days” for encapsulation. That number describes rolling out and seaming polyethylene. It does not describe the 48 – 72 hours a Henderson crawl space sometimes needs to drop below 60% relative humidity before a liner is worth installing. Between diagnostic readings and the final seam check, a crawl space enclosure is really four phases of work, and only the last one is the liner. This guide breaks the job into those phases, gives honest hour ranges for each, and explains which ones Henderson’s clay-heavy soil can push longer. You’ll finish knowing what your contractor should measure before starting, what the numbers should read, and what documentation should be in your hand at job close.
Quick Answer
A typical crawl space encapsulation in Henderson takes 2 to 4 days of on-site work, with the liner installation itself accounting for roughly 1 of those days. The rest is assessment, mold or debris remediation, and mechanical drying so the space sits below 60% relative humidity before the liner goes down. Homes that need extensive mold treatment, debris removal, or a drying period after active water intrusion are the ones that stretch to 5 or 7 days.
Table of Contents

- The Four Phases of an Encapsulation Job
- Why Henderson’s Soil Changes the Timeline
- The Moisture Readings to Ask For Before Work Starts
- The Scheduling Factor That Extends Most Jobs
- What Documentation Should Be in Your Hand at Job Close
- A Day-by-Day Walkthrough
- What DIY Timelines Get Wrong
- Common Mistakes to Avoid
- When to Call a Professional
- Frequently Asked Questions
The Four Phases of an Encapsulation Job
Every encapsulation breaks into four sequential phases, and skipping or compressing any of them is where the timeline estimates go wrong. Here’s what each phase involves in a Henderson crawl space and how long it takes.
- Assessment (2 – 4 hours). Before anything moves, we measure soil moisture with a pin or pinless moisture meter, log relative humidity with a hygrometer, inspect the foundation vents, and check for active water. The output is a written scope with readings attached. On crawl space encapsulation and vapor barrier in Henderson, this phase is where we decide whether the space can be enclosed today or needs drying first.
- Remediation (4 – 16 hours). This covers debris removal, mold treatment on joists and subfloor, and pest cleanup. Older Henderson homes in the Lake Mead corridor often have decades of dust, insulation scraps, and rodent waste that has to come out before a liner is even considered. Homes requiring active mold remediation push toward the high end of that range.
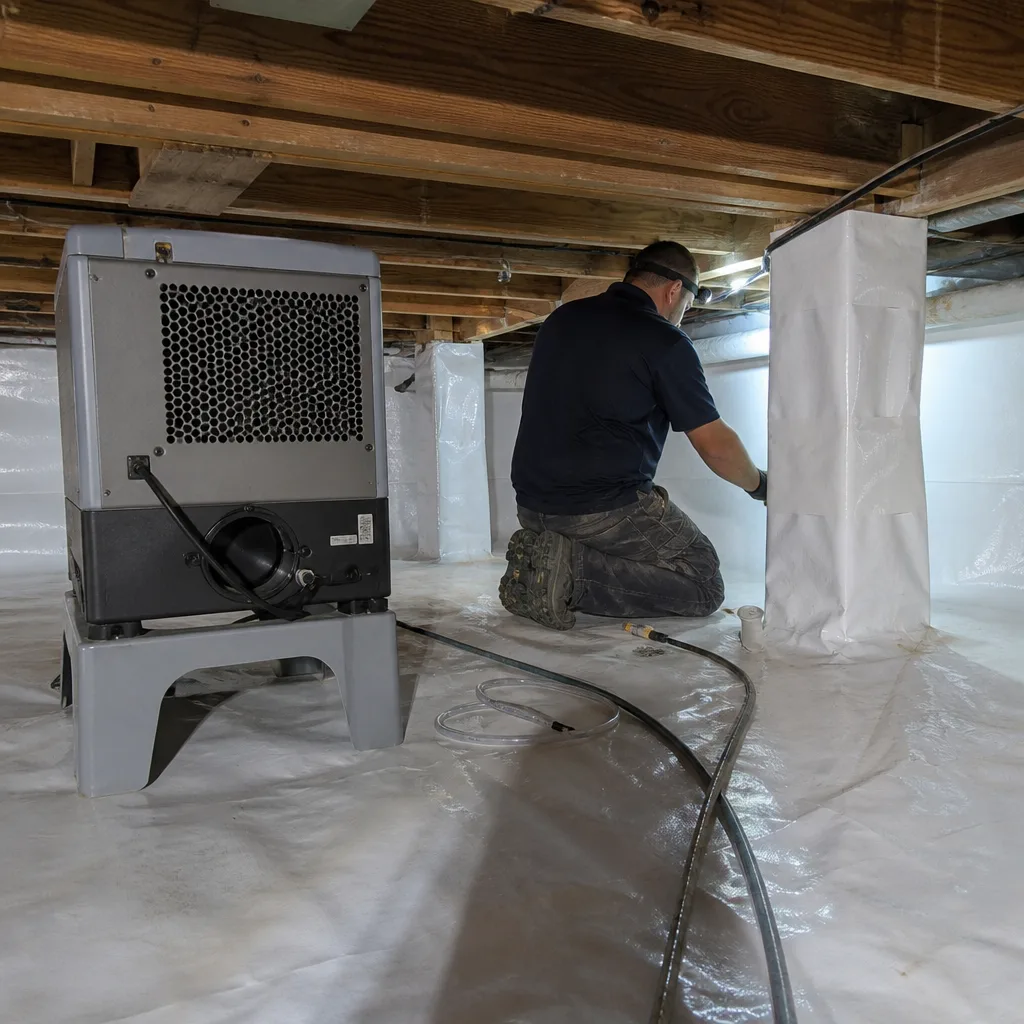
- Conditioning (24 – 72 hours, unattended). Sealed vents, a dehumidifier, and time. The crawl space needs to drop below 60% RH before the liner goes in. This phase is the one most timelines ignore, and it’s the one Henderson’s summer soil extends most often. You’re not paying for labor here, but you are paying for time and dehumidifier power.
- Liner installation (6 – 10 hours). Rolling out, seaming, taping, and terminating the liner at the foundation walls and piers. A clean 1,200-square-foot crawl space is a one-day job for a two-person crew. Piers, footings, and irregular footprints add hours.
Total the phases and a routine Henderson encapsulation lands at 2 to 4 days. Add remediation or drying and it goes to 5 to 7.
Why Henderson’s Soil Changes the Timeline

Henderson sits on a mix of alluvial soil and expansive clay, and that clay behaves differently from what coastal contractors write their timelines around. Coastal crawl spaces deal with standing water and constant humidity. Henderson crawl spaces deal with dry clay that swells and holds moisture after irrigation or a wet winter, then releases it slowly through spring.
Here’s the practical difference. A thin polyethylene liner installed over clay soil reading 45% moisture content traps that moisture against the foundation and vapor drives upward into the floor system. The measurements we take before recommending the liner come from the soil, not just the air. In our experience, Henderson crawl spaces that measure above 25% soil moisture often need a drying period before the liner or a thicker vapor barrier is worth installing.
Summer conditions add a second wrinkle. When outside humidity is high in Henderson and the vents are open, the crawl space pulls moisture in. Sealing the vents and running a dehumidifier for 48 to 72 hours is often what drops the space from 70% RH to the 50% range. That conditioning step is standard in desert climates because the ambient air won’t do the drying work for you the way a contractor from a dry coastal market might assume.
The upside is that once the liner is properly installed and the space is conditioned, Henderson crawl spaces dry out quickly and stay dry. Encapsulation here is more durable than in wetter climates because there’s less moisture trying to get in once the envelope is sealed.
The Moisture Readings to Ask For Before Work Starts
You can’t judge an encapsulation timeline without baseline numbers. Ask any contractor to show you these readings before work starts, and ask them to record the same numbers at job close so you have a real before-and-after.
- Soil moisture (% by weight). Measured with a moisture meter at multiple points. Above 25% typically means a drying phase before liner installation.
- Relative humidity (RH). Measured with a hygrometer at the center of the space and at each end. A crawl space should drop below 60% RH before a liner goes down, and stay below 50% once it’s in and the vents are sealed.
- Wood moisture content. Subfloor and joist readings above 18% indicate prolonged exposure and often correlate with mold on the framing, which triggers remediation.
- Ambient temperature. Relevant because dehumidifiers work less efficiently below 60°F and above 100°F, both of which can extend the conditioning phase.
These aren’t exotic tools. A $200 moisture meter and a decent hygrometer produce every number on that list. What matters is whether the contractor documents them and shares the readings with you. Under Haven Standard, every job begins with a written price and ends with a written record, and that record includes the readings for the crawl space work. If a contractor quotes “1 – 2 days” without taking these readings first, they’re quoting labor on a job they haven’t diagnosed.
The Scheduling Factor That Extends Most Jobs

The single factor that pushes the most Henderson encapsulation projects past their quoted timeline is discovering active water intrusion or failed vents only after the crawl space has been cleared. It’s not a labor problem. It’s a sequencing problem.
Here’s how it goes. The crew clears debris and finds a foundation crack with a slow seep, or a vent that was covered over by landscaping 15 years ago and is now a hollow point for water entry, or a plumbing leak that’s been dripping under the master bath for months. Now the scope changes. The water source has to be corrected before the liner is installed, or the liner seals moisture and mold against the framing.
Those discoveries add 1 to 5 days of work depending on the fix. A failed vent is an easy correction. A foundation crack and a plumbing leak require calling a foundation contractor or a plumber and coordinating. In Henderson, the most common culprit is a slow irrigation leak – homes built in the 2000s often had landscaping added after the fact, and a drip line or a spray head has been quietly soaking the clay against the foundation for years.
The fix for this is a proper pre-job walkthrough. Under Haven Standard: Arrive on schedule, and the assessment phase on a crawl space encapsulation in Henderson includes a short irrigation-system check where it’s accessible. We’d rather find the leak during the estimate than during remediation.
What Documentation Should Be in Your Hand at Job Close
A well-run encapsulation ends with a documented record, and that record should let you verify the work meets spec without crawling back under the house yourself. Ask your contractor before signature what will be delivered, and don’t accept “we’ll send photos after.”
At minimum, the job close should include:
- Pre- and post-installation relative humidity readings, dated.
- Pre- and post-installation soil moisture readings, dated.
- The liner’s mil thickness (6-mil, 10-mil, 12-mil, or 20-mil) stated in the scope and confirmed against the material delivered.
- Seam-tape brand and product name, since tape failure is the most common liner failure and knowing the brand matters if it fails.
- Vent cover specifications, including the number of vents covered and the material used.
- A photo record of the finished space, including pier wraps, seam tape lines, and the termination at the foundation wall.
Envelope Insulation Henderson includes a Documented Photo Record on every visit, and on crawl space jobs we provide before-and-after moisture readings so the change is visible in the numbers, not just in the photos. On jobs that also address attic air sealing, we publish before-and-after blower-door numbers – a pressurization measurement that shows, in one figure, how much conditioned air the home was losing before and after the work.
A Day-by-Day Walkthrough

What a 3-day Henderson encapsulation typically looks like, start to finish. Every job varies, but this is a realistic shape.
- Day 1, morning: Assessment and prep. Crew arrives, sets up containment, takes moisture and humidity readings, inspects vents and foundation. Written scope reviewed with you. If the space needs remediation, that starts here.
- Day 1, afternoon: Remediation. Debris removal, mold treatment if present, pest cleanup. By end of day the crawl space is empty and clean, and if there’s drying needed, that begins now.
- Day 1 evening into Day 2: Conditioning. Vents sealed, dehumidifier running. Humidity readings taken periodically. The space needs to reach below 60% RH before the liner goes in.
- Day 2 afternoon or Day 3 morning: Liner installation. Rollout, seam taping, pier wrapping, termination at the foundation wall. Two-person crew, 6 to 10 hours depending on footprint complexity.
- Day 3, end of day: Final readings and photo record. Post-installation RH and soil moisture readings logged. Walkthrough with you to review the space and hand off the documentation.
Jobs that need a plumbing or foundation correction first insert 1 to 5 days at the front. Jobs that uncover heavy mold insert 1 to 2 days into remediation. Those two scenarios account for nearly every project extension we see in Henderson.
What DIY Timelines Get Wrong
The retail yard “weekend project” framing of encapsulation gets the hours wrong in two directions at once. It underestimates the prep and it overestimates what a homeowner can reasonably complete safely.
On the underestimate side: the DIY plot usually starts at liner rollout and skips remediation, drying, vent sealing, and the diagnostic readings. Skipping drying is the common one. A homeowner rolls out 6-mil over a crawl space reading 70% RH, tapes the seams, and walks away. The moisture trapped underneath becomes a mold problem within a season, and the liner has to come out and be replaced. That replaces a 2-day job with a 4-day job plus material cost.
On the overestimate side: crawling a 1,200-square-foot crawl space with a staple gun and seam tape, at a 24-inch joist height, is a genuine physical job. Two people with the right tools can lay a liner in 8 to 10 hours. Two people without them take 2 to 3 weekends, and the seams are usually where the quality falls off. If any part of the space requires working around a wet foundation crack or a suspected mold problem, stop and call a professional – the risk of sealing moisture against the structure is real and it compounds.
The middle ground is straightforward. If you want to do the work yourself and the diagnostic readings are dry and clean, a weekend job is realistic. If the readings are high or the space is below 18 inches of clearance, or if any mold or active water is present, professional remediation and installation is the safer and faster path.
Common Mistakes to Avoid
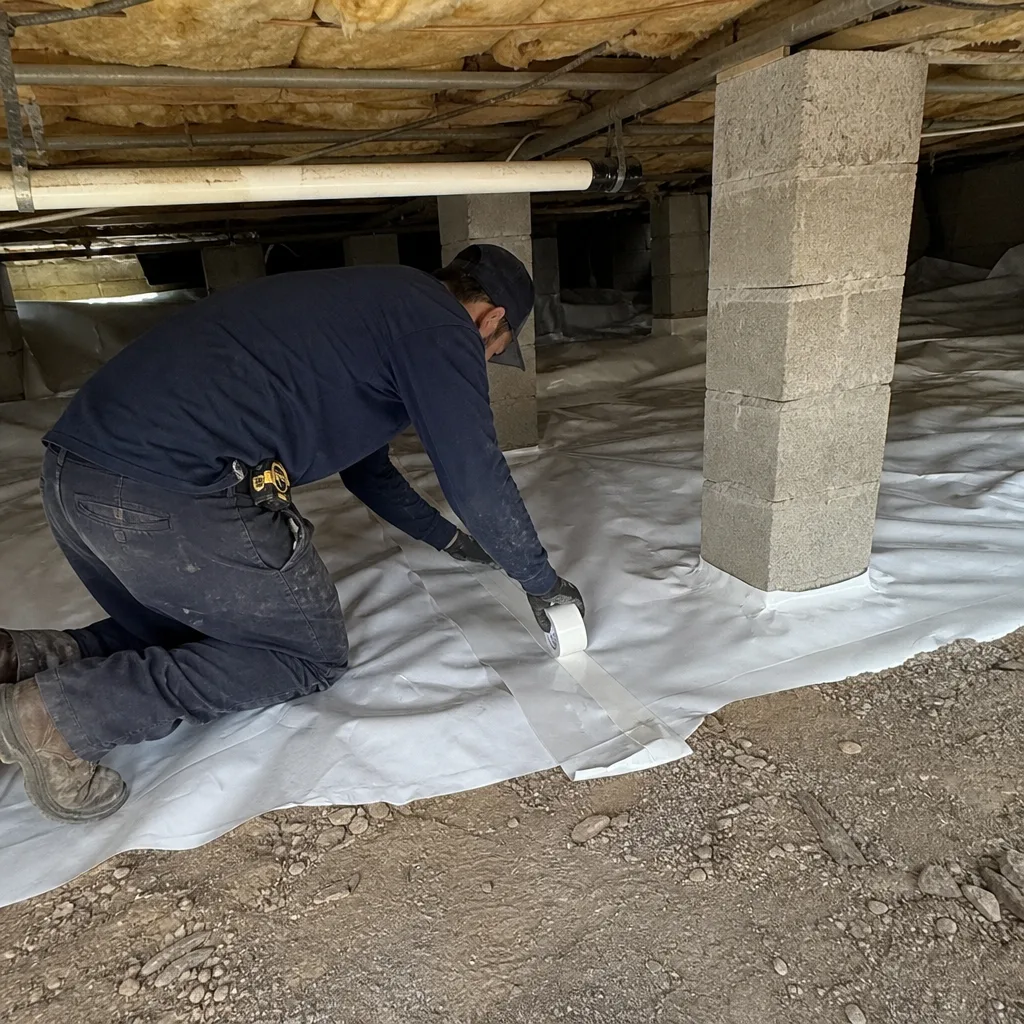
- Accepting a 1 – 2 day quote without diagnostic readings. A contractor who quotes a full encapsulation without measuring soil moisture and relative humidity is quoting the liner installation alone. Ask for the readings before signing.
- Skipping the drying phase in summer. Henderson crawl spaces often need 48 to 72 hours of conditioning in July and August. Rolling a liner over a space reading 70% RH is the most common cause of premature liner failure.
- Ignoring the irrigation leak. Homes in neighborhoods like Green Valley and Anthem frequently have drip lines running against the foundation. That water is invisible from above and it will ruin an encapsulation. Have the assessment phase include a check.
- Using thin liner as a cost-cut. 6-mil is a vapor retarder, not an encapsulation-grade barrier. Henderson’s clay-soil moisture load justifies a 10-mil minimum, and 20-mil woven liner where foot traffic or equipment will be in the space.
- Accepting “we’ll send photos” without a written scope. Under Haven Standard, “Have it in writing” is the first clause. If the scope, price, and warranty aren’t in writing before work starts, the documentation problem isn’t going to resolve at job close.
- Not asking about the seam tape brand. Tape failure is the single most common failure point on an otherwise sound encapsulation. A generic brand that doesn’t specify a service life is a red flag.
- Assuming a fixed date and moving on. Plan for 2 to 4 days of on-site work, and if the contractor’s estimate is 1 day, ask why their assessment, remediation, and conditioning phases aren’t in the estimate.
When to Call a Professional
Call a professional if any of the following is true: the crawl space has visible mold on framing or subfloor, there’s standing or active water anywhere in the space, the clearance is under 18 inches, the home is on a clay-heavy Henderson lot with a history of foundation movement, or the diagnostic readings are above 60% RH before work starts. Those conditions point to remediation and drying work that has to happen before a liner is installed, and doing it in the wrong order means replacing the liner later.
If the crawl space is clean and dry and the readings are good, a homeowner with the right tools can install a vapor barrier as a weekend project without a problem. The two scenarios have different timelines for a reason.
Envelope Insulation Henderson offers free estimates in Henderson – call (844) 320-5338. We take the moisture readings as part of the estimate, so you’ll know before you commit which phase your crawl space actually needs.
Frequently Asked Questions
Two to four days of on-site work for most Henderson homes, with 5 to 7 days for jobs that need mold remediation or a drying period before the liner goes in. The liner installation itself accounts for about one day. Call (844) 320-5338 for a free estimate – we take the readings during the estimate so the timeline is priced against your actual crawl space.
Only if the crawl space is already clean, dry, and vented correctly. A one-day quote is essentially the liner installation phase alone. If the contractor hasn’t measured soil moisture and relative humidity, the “one-day” number is real but the diagnosis is missing, and the liner could seal moisture against your framing. Call us for a second opinion on any written estimate, free.
Clay-heavy soils hold moisture differently than sandier or coastal soils. After spring irrigation or a wet winter, the clay under a Henderson crawl space can sit above 25% moisture content for weeks, and ambient summer humidity means an open-vent crawl space pulls moisture in rather than drying out. Sealing the vents and running a dehumidifier for 48 to 72 hours is often what drops the space below 60% RH. Call (844) 320-5338 – we’ll tell you from the readings whether your space needs this step.
Encapsulation for a typical Henderson crawl space runs between roughly $1.50 and $4.00 per square foot depending on liner thickness, moisture conditions, and remediation needed. A 1,200-square-foot crawl space usually lands in the $2,500 to $4,500 range with a 10-mil or 12-mil liner. Homes needing mold remediation or major debris removal go higher. Estimates are free and written – call (844) 320-5338 for an exact number for your space.
Below 60% relative humidity at the center of the crawl space, and ideally in the 50% range once the vents are sealed. Soil moisture should be under 25% by weight. Wood moisture on the subfloor and joists should be under 18%. Ask the contractor for those readings before liner installation starts and again at job close. Call (844) 320-5338 if you’d like us to review a set of readings from another contractor.
The job pauses and the water source has to be corrected before the liner is installed. That adds 1 to 5 days on the front end, depending on whether it’s a plumbing fix or a foundation repair, because the correction requires coordinating with another trade. In Henderson, slow irrigation leaks are the most common culprit – homes built in the 2000s with post-construction landscaping are the usual suspects. A proper assessment phase finds these before the liner goes down. Call (844) 320-5338 for an estimate that includes the assessment.
The Bottom Line
Encapsulation timelines are almost always quoted for the liner installation alone. The real job is four phases: assessment, remediation, conditioning, and installation. In Henderson, the conditioning phase runs longer than in most markets because clay-rich soil holds moisture and summer humidity keeps vented crawl spaces from drying on their own. A realistic timeline is 2 to 4 days on site, with 5 to 7 for jobs that need mold remediation or a drying period. Ask any contractor for the soil moisture and relative humidity readings before signing, plan around the possibility of finding irrigation leaks or failed vents, and expect the documentation at job close to include pre- and post-humidity readings, liner mil thickness, seam-tape brand, and vent cover specs.
Related Reading
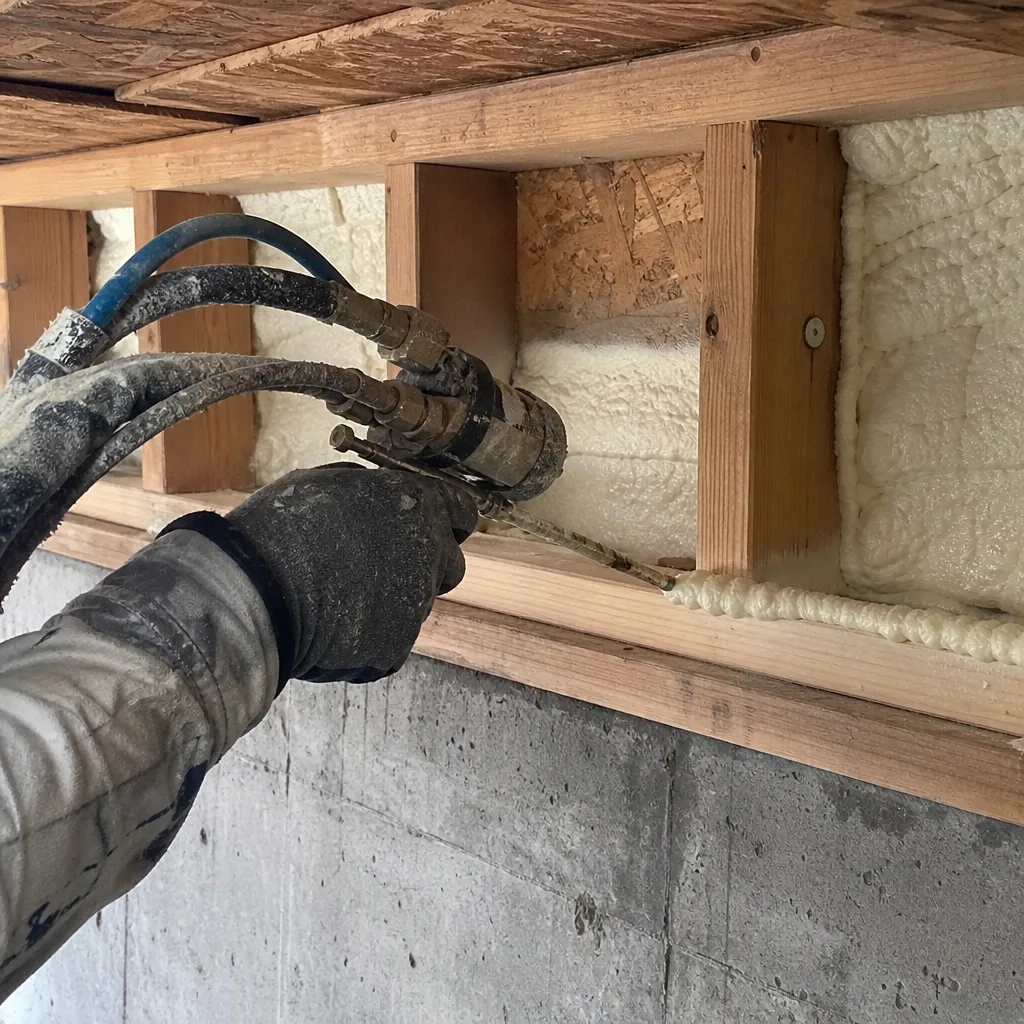
If you’re weighing encapsulation against attic-side improvements, our Envelope Insulation Henderson home page lays out the full building-envelope service line. For crawl space pricing and scope, see Crawl Space Encapsulation & Vapor Barrier in Henderson. If your air-sealing readings point to attic losses, Attic Insulation in Henderson covers the sealed-first, insulated-second sequence. And for knee-wall and rim-joist gaps that interact with the crawl space envelope, Spray Foam Insulation in Henderson explains where foam belongs on a Henderson retrofit.
Contact
Envelope Insulation Henderson provides crawl space encapsulation and vapor barrier work across Henderson. Every job begins with a written price and ends with a Documented Photo Record, and we take the moisture readings as part of the estimate so you can see before and after in the numbers. Under the 365-Day Done Right Promise, if it’s not done right, we make it right. Call (844) 320-5338 for a free estimate – a live person answers, 24/7.
Written by the team at Envelope Insulation Henderson.