
Last updated November 17, 2026
Seasonal Insulation Care for Henderson: Year-Round Homeowner’s Guide
The worst time to find out your attic insulation has settled below minimum depth is the first week of June. Attic temperatures are already pushing 150°F up there, your HVAC is running flat-out, and the electric bill that just landed is the first real evidence something is wrong. We see this every year in Henderson. The homes that hold up through August aren’t the ones with the most insulation. They’re the ones whose owners worked the stress calendar instead of waiting for a spring-cleaning reminder. This guide lays out what to check and when across Henderson’s two genuinely different thermal seasons: the radiant assault from May through September and the wind-driven cold that runs November through February.
Quick Answer
In Henderson, insulation care follows two seasonal checkpoints, not a generic spring-and-fall routine. Run a pre-summer inspection in March and April (attic depth, radiant barrier condition, duct boot seals, hatch weatherstripping) to prepare for the May – September heat load, then run a pre-winter inspection in October (exterior caulk, crawl-space vent dampers, outlet gaskets on exterior walls) to prepare for wind-driven cold infiltration. Add a post-wind-event check after any significant Santa Ana-adjacent wind, and record what you find each season with a date so future work has a documented history.
Table of Contents

- Why Henderson Needs Its Own Insulation Calendar
- Pre-Summer Checklist: March and April
- Summer Monitoring: Reading Your Ceilings With a Thermometer
- Pre-Winter Checklist: October
- Post-Wind-Event Inspection
- What to Record and Date Each Season
- Common Mistakes to Avoid
- When to Call a Professional
Why Henderson Needs Its Own Insulation Calendar
Most insulation advice you’ll read online was written for a climate with one dominant season. Henderson has two, and they attack the building envelope in different ways. From May through September, the sun loads the roof deck for ten or more hours a day. That heat drives downward through the attic, and the insulation’s job is to slow it before it reaches your ceiling drywall. From November through February, the pressure reverses. Cold air pushes against the envelope from outside, and every unsealed penetration becomes an infiltration point. A house that performed well in July can still feel drafty in January, because the two problems live in different parts of the assembly.
Henderson’s housing stock adds a wrinkle. The neighborhoods built out between 2015 and 2025 – the newer tracts in the far south and east, and the infill homes closer to Water Street and Lake Mead Parkway – were generally constructed to tighter energy code than the 1990s stock near Green Valley, but “tighter code” doesn’t mean “maintenance-free.” Blown fiberglass settles. Radiant barrier foil gets torn by a contractor crawling through on an unrelated job. Attic hatch weatherstripping compresses and pulls loose after a few summers of heat cycling. The calendar below exists because those failures have predictable timing, and catching them before the season that exposes them saves money. Our full range of Envelope Insulation Henderson home services is built around this same sequence: seal first, then insulate, then document.
Pre-Summer Checklist: March and April

This is the highest-leverage window on the Henderson calendar. Attic temperatures are still workable, HVAC hasn’t hit peak load, and any deficiency you find now gets fixed before it costs you a full summer of cooling dollars. Run these four checks in order.
- Measure attic insulation depth. Use a tape measure or a marked stick at three or four points across the attic floor, away from the access hatch. Write the numbers down. Settled blown insulation often reads 2 to 3 inches shallower than the day it was installed.
- Inspect the radiant barrier. If your roof deck has foil, walk the attic with a flashlight and look for tears, sagging, and gaps along the staple lines. Foil that has pulled away from the rafters loses most of its ability to reflect heat back before it reaches the insulation.
- Check duct boot seals at the registers. From inside the attic, look at where each duct boot meets the drywall ceiling. You’re looking for gaps, disconnected flex duct, and torn mastic. A leaking boot dumps conditioned air straight into a 150°F attic.
- Test the attic hatch weatherstripping. Press on the hatch from below. If it compresses easily or you can see light around the perimeter, the gasket has aged out. Replacing it is a small job with an outsized effect on summer performance.
If your depth check comes back low, this is the month to schedule Attic Insulation in Henderson. Blowing insulation in April means you get the full cooling season out of it. Doing it in August means you paid for a summer you didn’t benefit from.
Summer Monitoring: Reading Your Ceilings With a Thermometer
You don’t need to crawl into a 150°F attic in July to know whether your insulation is working. A non-contact infrared thermometer, the kind that costs under thirty dollars, tells you most of what you need from inside the house. Point it at the ceiling drywall across several rooms, ideally around mid-afternoon on a clear day when the heat load is at its peak.
Here’s how to read it. A well-insulated ceiling in a Henderson home should show relatively even surface temperatures room to room. What you’re hunting for are localized hot spots – a patch of ceiling reading ten or more degrees warmer than the surrounding drywall. That pattern usually points to one of three things: insulation that has been displaced or blown thin directly above that spot, a gap where a recessed can light or ceiling fan box interrupts the insulation field, or a section where a duct run has compressed the insulation beneath it. Mark each spot with painter’s tape and note its location relative to a landmark in the room.
The reading won’t tell you the depth. It tells you where to look when you or a technician go up. In our experience across Henderson attics, ceiling hot spots that read more than 10°F above the surrounding field almost always correspond to a real deficiency, not just a change in insulation color or a shadow. Write down the date, the outdoor temperature, and the readings. That record becomes the baseline you compare against next summer.
Pre-Winter Checklist: October

October in Henderson is the mirror image of March. The heat load is dropping, the attic is workable again, and you have a few weeks before the wind-driven cold period settles in. This checklist targets infiltration, not heat transfer.
- Caulk inspection on exterior penetrations. Walk the outside walls and look at every pipe penetration, hose bib, vent, and utility entry. Any caulk joint that has cracked or pulled away is a cold-air pathway. Note the location of each before you reach for a tube of sealant.
- Crawl-space vent damper operation. Homes with a vented crawl space use seasonal dampers to close foundation vents during cold weather. Test each one to confirm it actually opens and closes fully. A damper stuck open pulls cold air under the floor all winter.
- Wall switch and outlet gasket check. On exterior walls, remove a switch plate or outlet cover at a few locations and look for a foam gasket behind it. Many Henderson homes have none. Where you can feel cold air moving past the plate on a windy morning, an insulating gasket is a fast, low-cost fix.
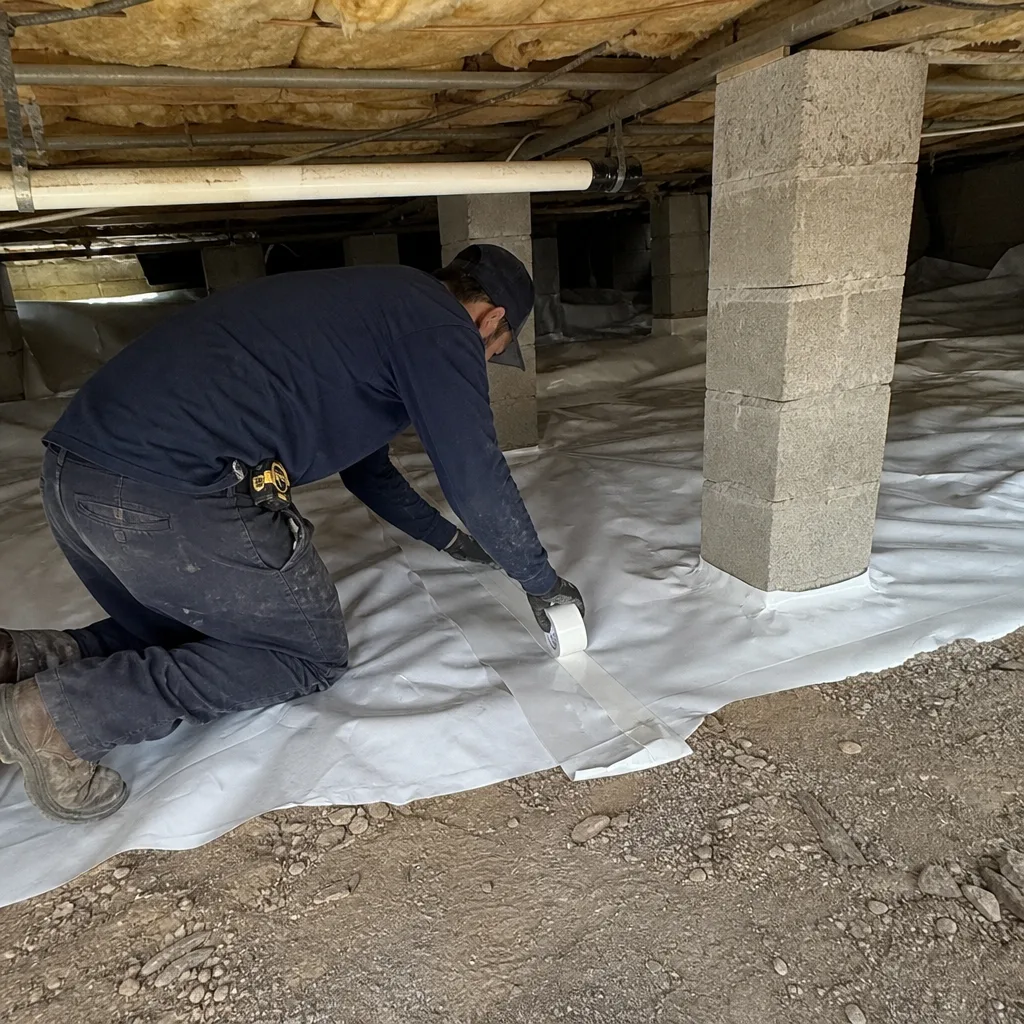
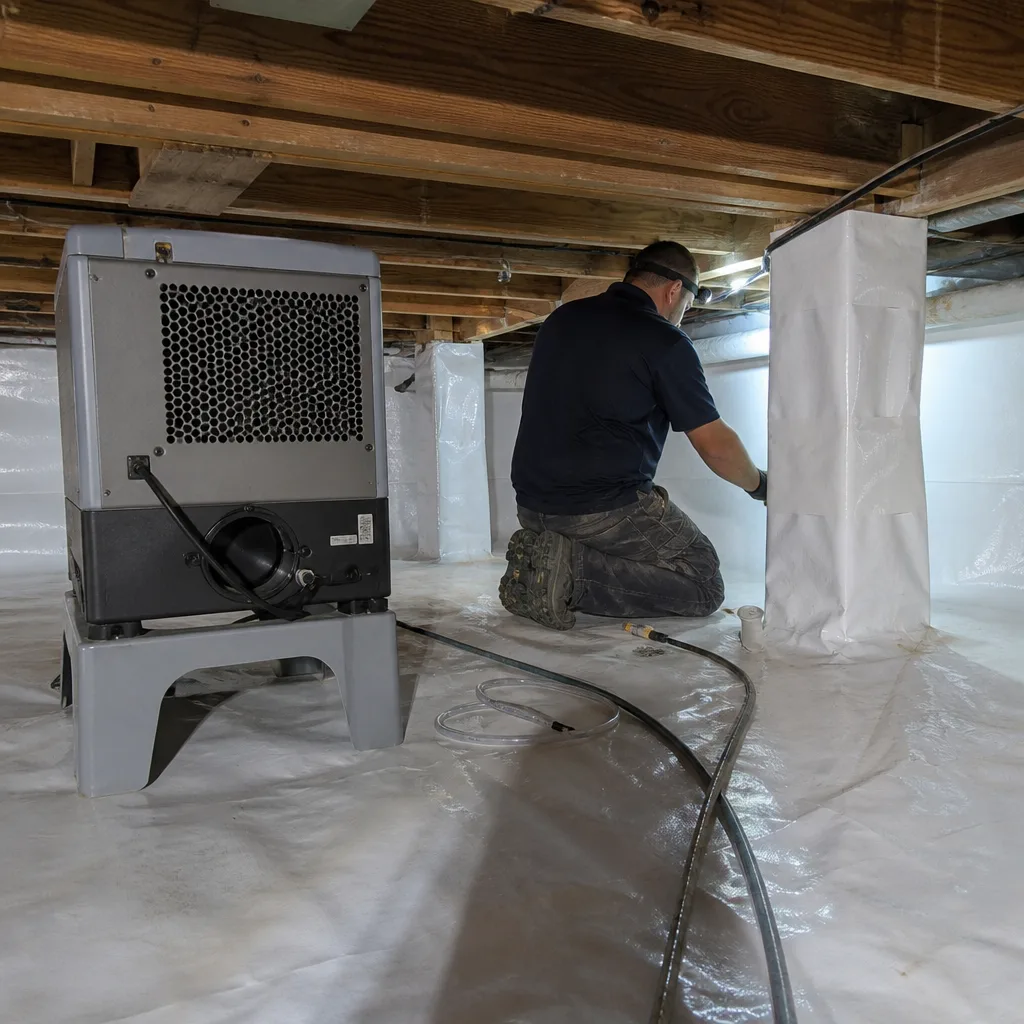
If your crawl space shows moisture, condensation, or a vapor barrier that has torn away from the foundation walls, that’s a separate project and one best done before winter. Our Crawl Space Encapsulation & Vapor Barrier in Henderson service covers that work, and it pairs naturally with the October inspection because both happen in the same window.
Post-Wind-Event Inspection
Henderson gets wind events, especially in the shoulder seasons, that a lot of homeowners don’t think to inspect for afterward. A strong wind event can do two things to your envelope. First, it can dislodge loose-fill insulation from open eave areas where the blown material has never been capped or baffled. Second, it can pull weatherstripping from an attic hatch or a crawl-space door, especially on the windward side of the house.
The inspection after a wind event is quick. Go up to the attic and look along the eaves on the windward side. If you see bare drywall or a thin strip of insulation where the field above it is deep, the wind has moved material. Check the hatch gasket and any exterior door weatherstripping on the same side of the house. Check the crawl-space vent dampers too, since persistent wind can push a damper partially open or pull a screen loose. Document what you find with a photo and a date even if you decide not to fix it immediately. This is the kind of observation a future contractor needs, and it’s the kind you’ll forget by the time you need it.
If the wind has exposed the eave areas repeatedly, that’s a sign the insulation needs baffling or an air-sealing pass, not just a top-up. That’s a job for a technician, and it’s exactly the kind of call that our Spray Foam Insulation in Henderson service is designed for where the gap is at the roof line. Spray foam applied to the correct surfaces locks material in place so wind can’t move it.
What to Record and Date Each Season

The single most underused tool in home insulation maintenance is a written record. Every check you run produces a data point that makes the next check faster and the next contractor’s job better defined. Keep a simple notebook or a notes file, and record the following each season:
- Attic insulation depth. The measurement at each of your sample points, dated. Note the material type if you can identify it – Owens Corning, Johns Manville, Knauf, and Rockwool products have distinct appearances and identifying tags.
- Condition observations. Radiant barrier tears, duct boot seal failures, hatch weatherstripping condition, baffle placement. Whatever you found, in whatever room or bay it was in.
- Pest or moisture signs. Rodent droppings, nesting material, chewed duct insulation, water staining on the roof deck, condensation on the vapor barrier. Note the location and the date. These compound over time and are the fastest way to justify an intervention.
- Ceiling hot-spot readings. The thermometer reading, the room, the location within the ceiling, the outdoor temperature, and the date.
- Any work performed. What was done, by whom, the written price, and the before-and-after documentation you were given. Under Haven Standard, every job we complete includes a written scope, a written warranty, and a Documented Photo Record, and on applicable jobs we publish before-and-after blower-door readings – a pressurization measurement that shows, in one number, how much air your envelope was leaking before and after the work.
This record is worth more than it sounds. When a future contractor opens your attic and sees a written history with dates, they know what they’re looking at and they can price the work accurately. When they open an attic with no history, they’re guessing. The Haven Standard we work under treats documentation as a clause, not an add-on: no work starts without a written price, and no job closes without a record.
Common Mistakes to Avoid
- Blowing new insulation over an unsealed attic floor. This is the most expensive mistake on the list and the most common. Adding depth over unsealed top plates, can lights, and penetrations traps the air leaks in the thermal layer, and the performance gain is a fraction of what the homeowner paid for. Air sealing comes first, then insulation – in that order, always.
- Waiting for the bill to be the trigger. By the time a Henderson homeowner sees a summer bill spike, the season is already underway. Move the inspection to March and April so the fix is in place before the load arrives.
- Assuming a newer Henderson home doesn’t need a check. Code compliance at build-out says nothing about settling, radiant barrier condition, or whether a contractor crawled through last year and tore a section of foil.
- Ignoring the crawl-space vents entirely. Owners of vented crawl spaces often leave dampers open all winter. The cold pulls through underneath the floor and the home feels tight in summer and cold in winter, with no obvious culprit to point at.
- Skipping the post-wind inspection. A dislodged eave section is invisible from the living space and obvious from the attic. It’s a fifteen-minute check after a strong wind event that can save a full insulation season.
- Leaving outlet plates and switch covers un-gasketed on exterior walls. These are the kind of small gaps that stack. A dozen of them on the windward side of a Henderson home feel like an open window on a January morning.
- Hiring a contractor who doesn’t put the price on the page. If a company won’t give you a written price before any work starts, you have no basis for evaluating the job. The Haven Standard Clause 1 is a written price, a written scope, and a written warranty before anyone lifts a tool.
When to Call a Professional
Some inspection work is a homeowner job. Measuring depth, watching for ceiling hot spots with a thermometer, and photographing a hatch gasket are all reasonable to do yourself. Air sealing is different. Attics in Henderson routinely hit 150°F, and the work involves moving across joists, working around electrical penetrations and recessed can lights, and applying materials to the building assembly. Loose-fill insulation over the wrong surface, or spray foam applied to a wet or under-specified surface, causes problems that show up a season later and cost more to fix. If your attic depth check comes back below the minimum for the climate, if you’ve found ceiling hot spots reading more than 10°F above the surrounding field, or if a wind event has exposed eave areas that need baffling, that’s the point to bring in a technician. Our own technicians have up to 10 years of experience, and every job starts with a free second opinion on any written estimate you already have. Envelope Insulation Henderson offers free estimates in Henderson – call (844) 320-5338.
Frequently Asked Questions
Twice a year, at minimum, plus a check after any significant wind event. The March – April pre-summer check and the October pre-winter check are the two anchor dates, because they land just before each of Henderson’s two thermal stress seasons. If your home was built between 2015 and 2025 and you’ve never done a depth check, start with March. Settled insulation doesn’t announce itself; it just shows up on the electric bill in August.
Most Henderson homes should see roughly 10 to 14 inches of settled blown insulation on the attic floor, measured away from the access hatch and away from spots where a duct run has compressed it. If your measurement comes in under about 9 inches, you’re likely losing performance. The exact number depends on the insulation material and the home’s construction, which is why we measure at multiple points and record the material type. Call (844) 320-5338 for a depth check with a written scope and price.
It depends on the roof deck and attic geometry, but in Henderson’s summer heat load a radiant barrier is one of the few upgrades that returns its cost within a few cooling seasons on the right home. If you have foil and it’s torn, sagging, or has staple-line gaps, that’s a repair that matters far more than topping up insulation. Have the condition photographed and evaluated before deciding to add or replace.
Partially, yes. A non-contact thermometer pointed at interior ceiling drywall on a clear afternoon will show you hot spots that indicate thin or displaced insulation directly above. It won’t tell you the depth, the material condition, or whether the air seals beneath the insulation are intact. For those, you need to be in the attic, and in peak summer that’s a job for a trained technician. Call (844) 320-5338 and we’ll schedule a full evaluation with documentation.
Cold floors on the first floor, condensation on the vapor barrier, visible moisture, a vapor barrier that has torn away from the foundation walls, or vent dampers that don’t close fully. Any of those mean the crawl space is pulling heat out of the house all winter and, in wetter years, adding humidity load. If you’ve never had the vapor barrier inspected, October is the right month to do it. Call (844) 320-5338 for a written evaluation.
Repair is almost always cheaper when the existing insulation is intact and the problem is a localized deficiency – a displaced section, a torn radiant barrier, a leaking duct boot, or missing air seals under the field. Replacement is usually warranted when the insulation has been compacted by moisture, contaminated by rodent activity, or when the removal is needed to get access to air sealing the attic floor properly. The right answer comes from a full inspection with a written scope, not a phone estimate. Call (844) 320-5338 for a free second opinion on any written estimate you have.
The Bottom Line
Henderson homeowners don’t need a generic spring and fall reminder. They need a stress calendar: a March – April pre-summer inspection for attic depth, radiant barrier condition, duct boot seals, and hatch weatherstripping; a summer monitoring routine that uses a non-contact thermometer on interior ceilings to find hot spots; an October pre-winter check on exterior caulk, crawl-space dampers, and outlet gaskets; and a post-wind inspection after any significant event. Record what you find and date it. That written history is what lets the next contractor price the work accurately and lets you see the performance change you paid for. If the inspection turns up something you can’t safely handle in a 150°F attic, that’s when you call. Envelope Insulation Henderson operates under The Haven Standard – written price before work starts, air sealing before insulation, before-and-after blower-door numbers documented on applicable jobs, and the 365-Day Done Right Promise. Call (844) 320-5338 for a free estimate.
Written by the team at Envelope Insulation Henderson.